How to Create Coupon System with Mini Cart in Divi Theme
Imagine this: your customer is browsing through your online store, excitedly adding items to their cart. But when it’s time to apply a coupon, they’re forced to jump through hoops—navigating away from the cart, finding a separate page, and eventually losing interest in the purchase altogether. Frustrating, right?
That’s where the Mini Cart in Divi comes to the rescue! This sleek, user-friendly tool allows shoppers to view their cart, apply coupons, and proceed to checkout without breaking a sweat. It’s like giving your customers a fast pass to a seamless shopping experience.
In this blog, we’ll show you exactly how to set up a coupon system directly within the Mini Cart in Divi. Interested? Dive in then!
Step-by-Step Guide to Mastering Coupons in the Mini Cart with Divi
Whether you’re looking to boost conversions, reduce cart abandonment, or simply impress your customers with a polished eCommerce experience, this guide has you covered. Let’s create a Mini Cart that doesn’t just look good but works like magic!
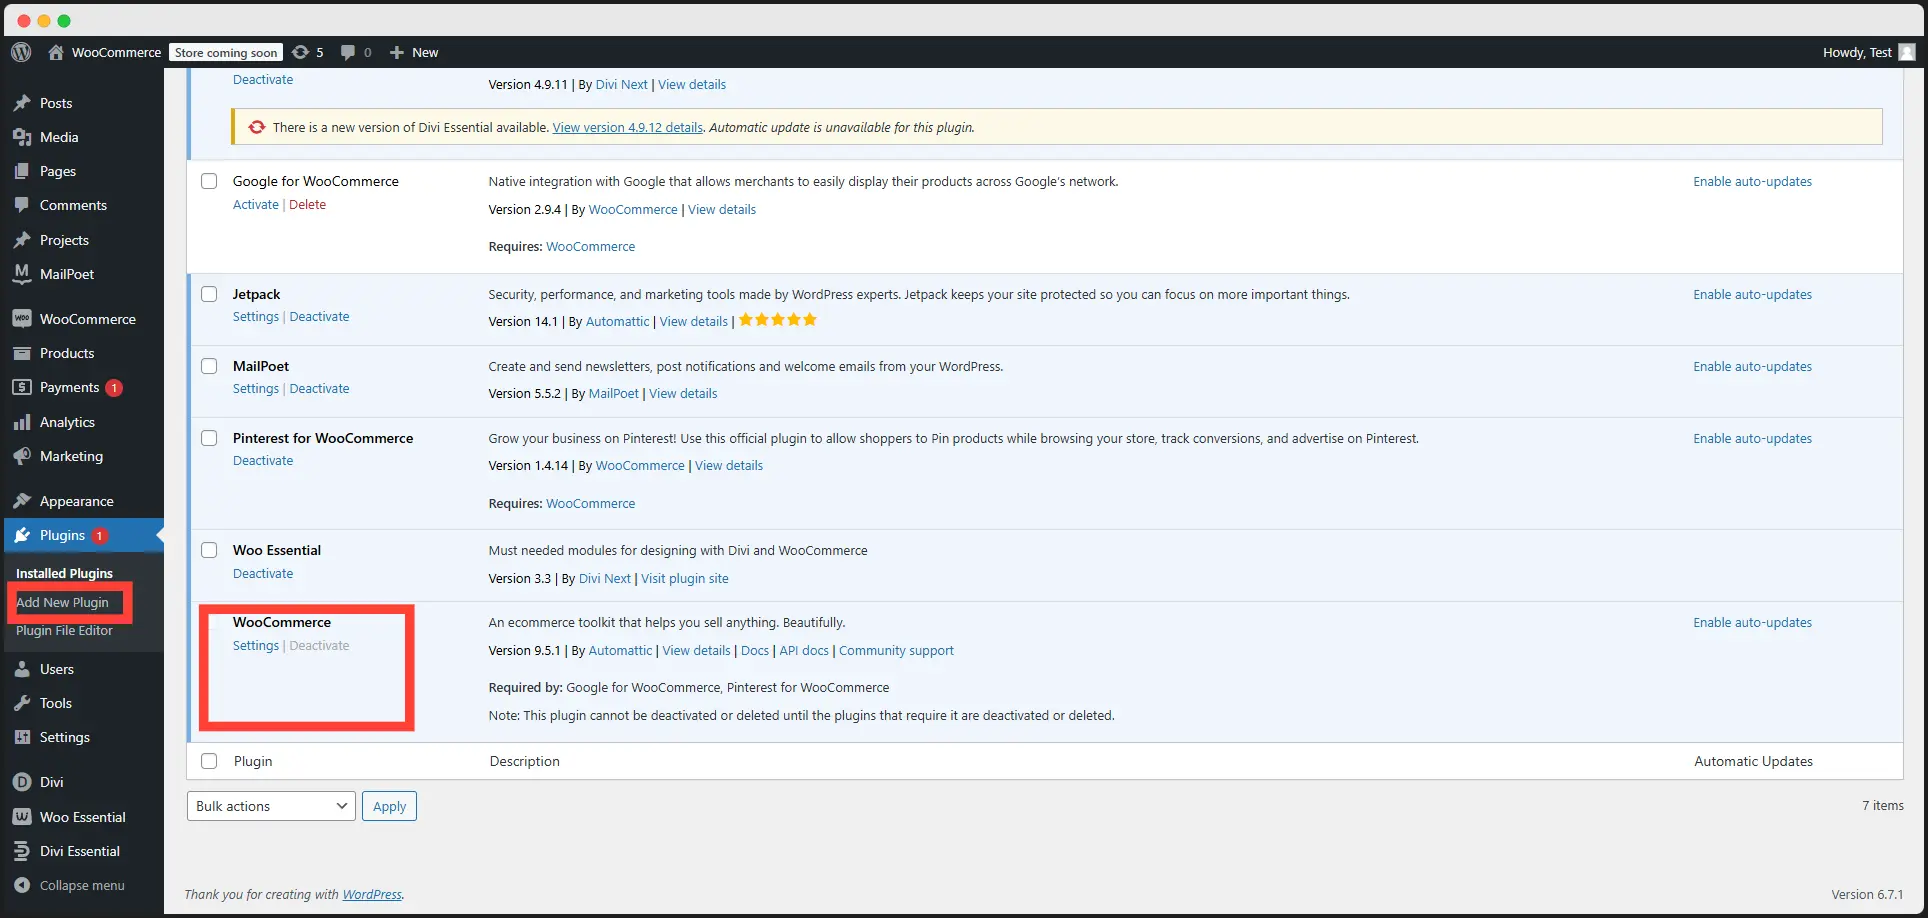
Step 1: Install & Activate WooCommerce
To create a functional Mini Cart in Divi, you first need to set up WooCommerce, the backbone of eCommerce functionality in WordPress.
- Go to Plugins > Add New in your WordPress dashboard.
- Search for WooCommerce, click Install Now, and then hit Activate.
- Complete the setup wizard to configure your store settings, such as currency, payment methods, and shipping zones.
Pro Tip: Double-check your store’s general settings to ensure everything aligns with your business needs.
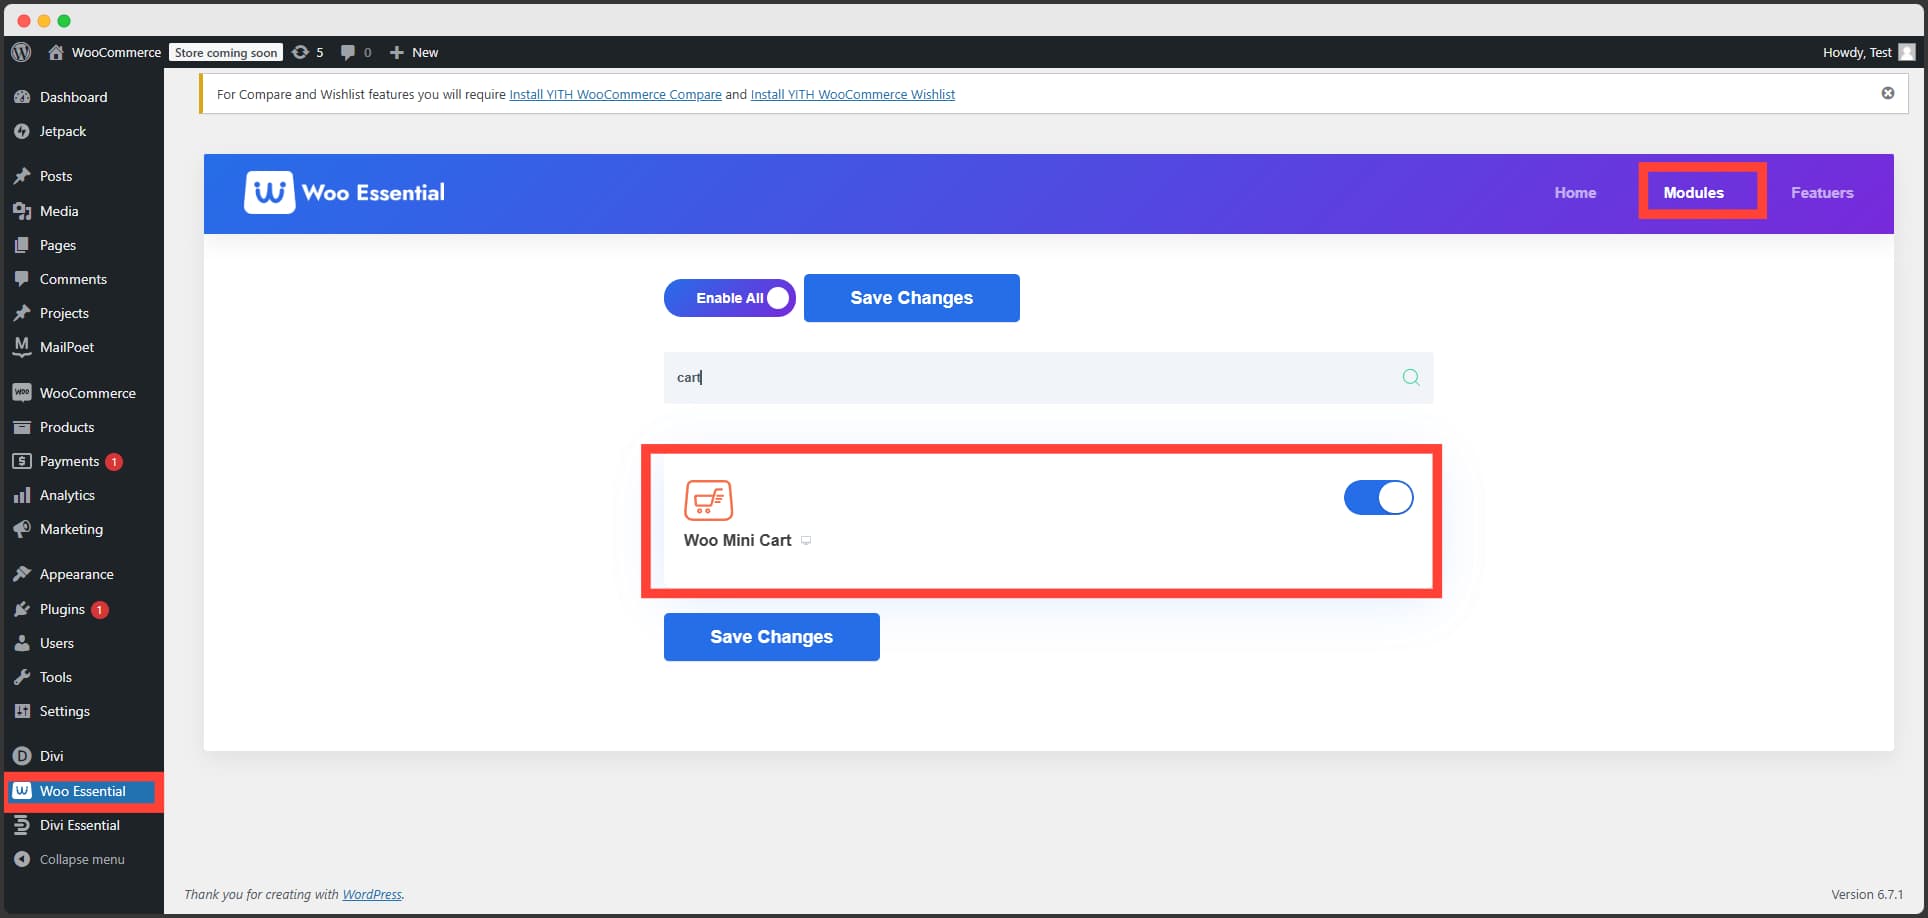
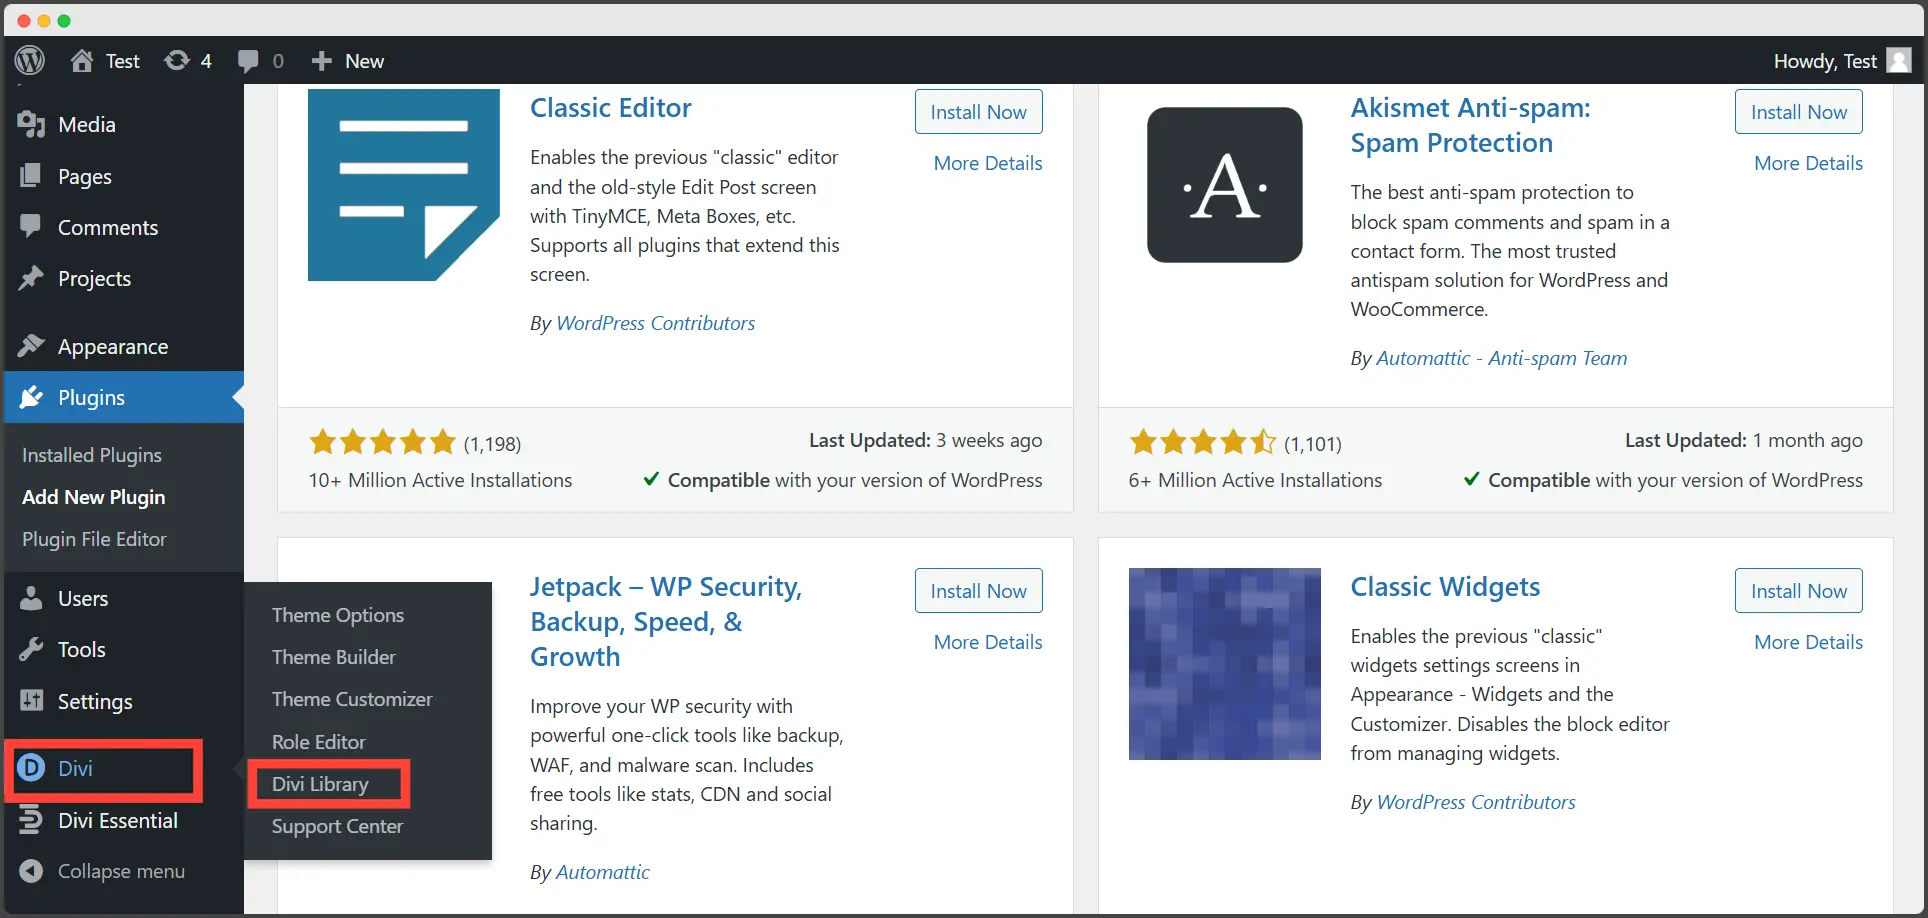
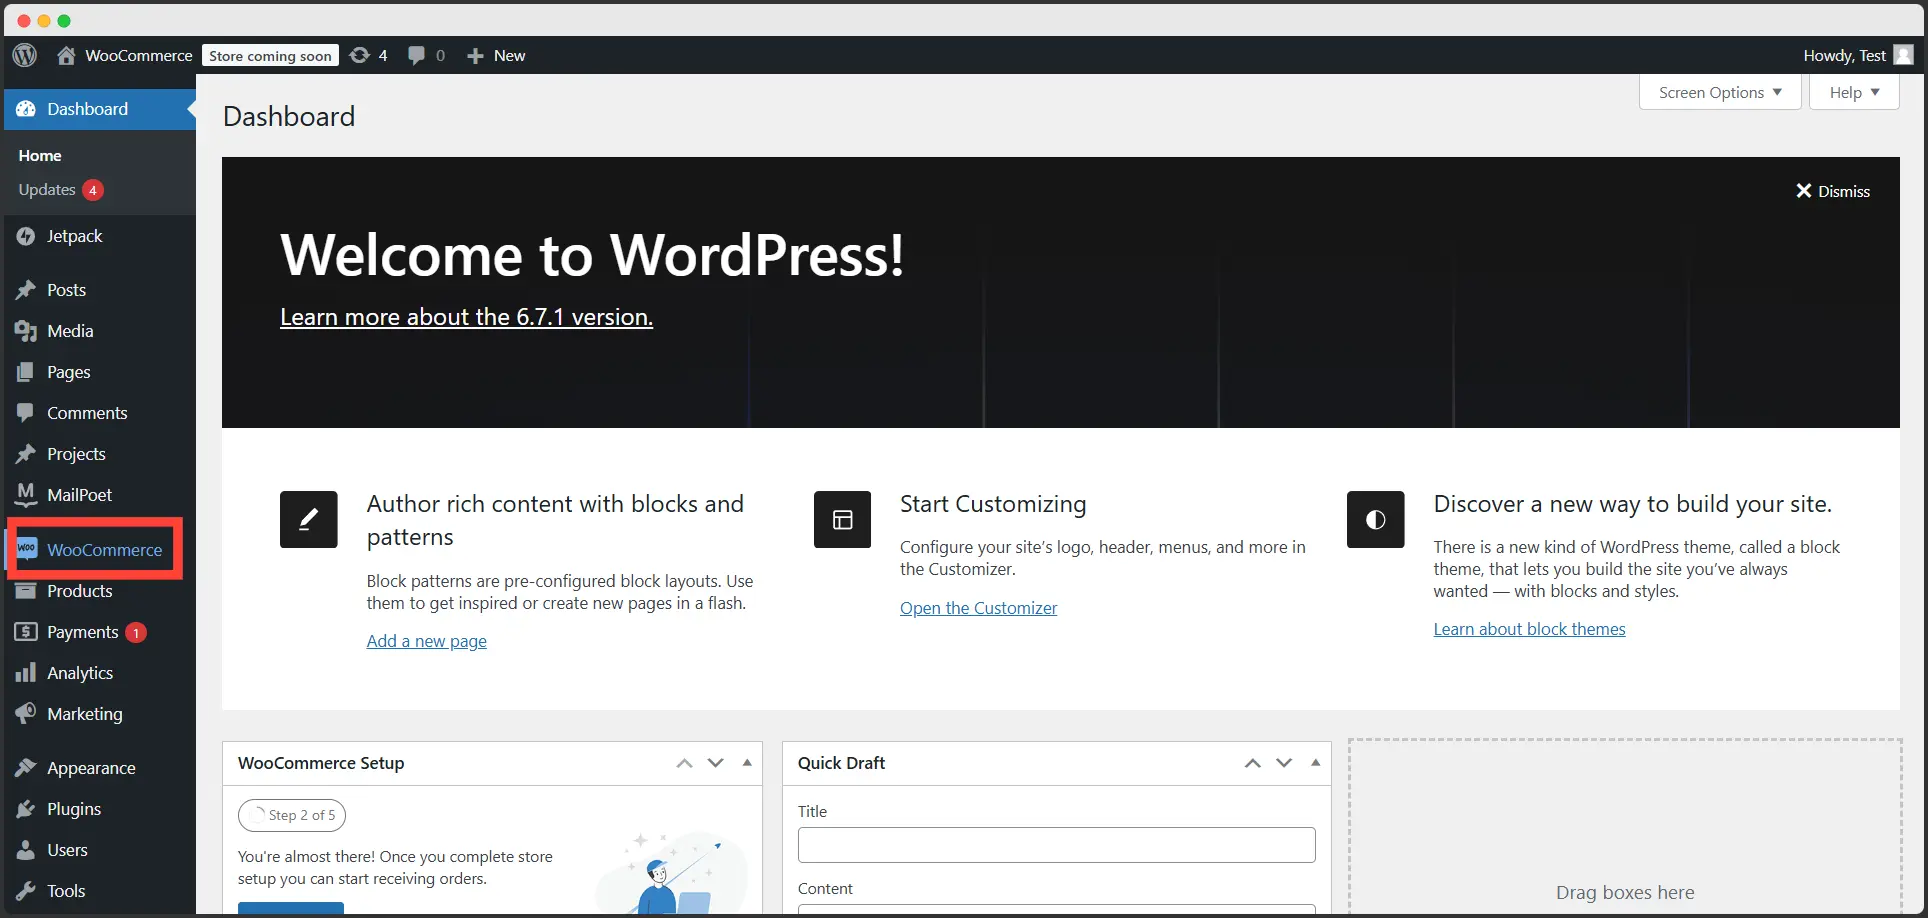
Step 2: Enable the Mini Cart in Divi
Divi’s Mini Cart feature allows customers to view their cart contents in real-time without navigating to a separate cart page.
- Open Woo Essential from the WordPress dashboard.
- Go to Modules and make sure the Enable Mini Cart toggle is turned on.
- Save your settings.
This will activate the Mini Cart, which you can now style and customize for your site.
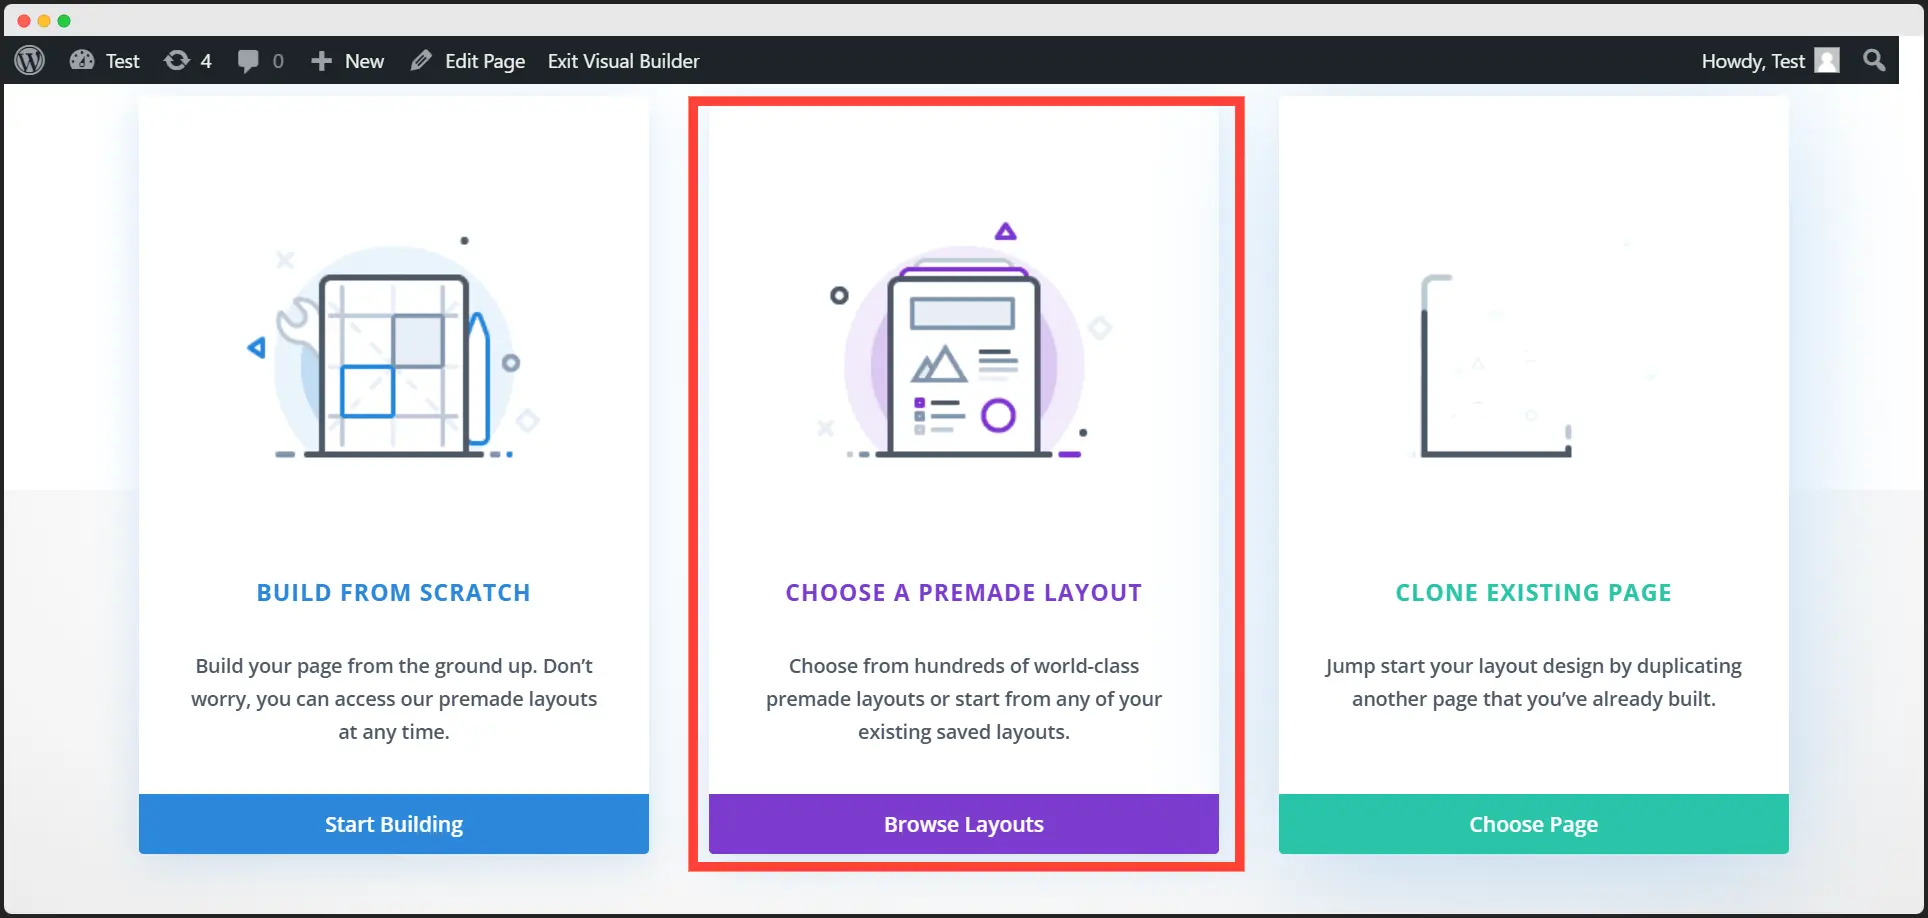
Step 3: Create Your Site
It’s time to create your WooCommerce Site now. To do that-
- Click Add New Page from the WordPress dashboard.
- Now give your page a name and create it with Divi Builder.

Now, from woo starter templates download suitable template and add it to your divi library.
Once you are in the Divi Builder, choose the premade layout option and select the added layout from the saved layout.
Step 4: Add product to Your Site
Your Mini cart is available now! Now, before adding coupon, add products to your page by the following process:
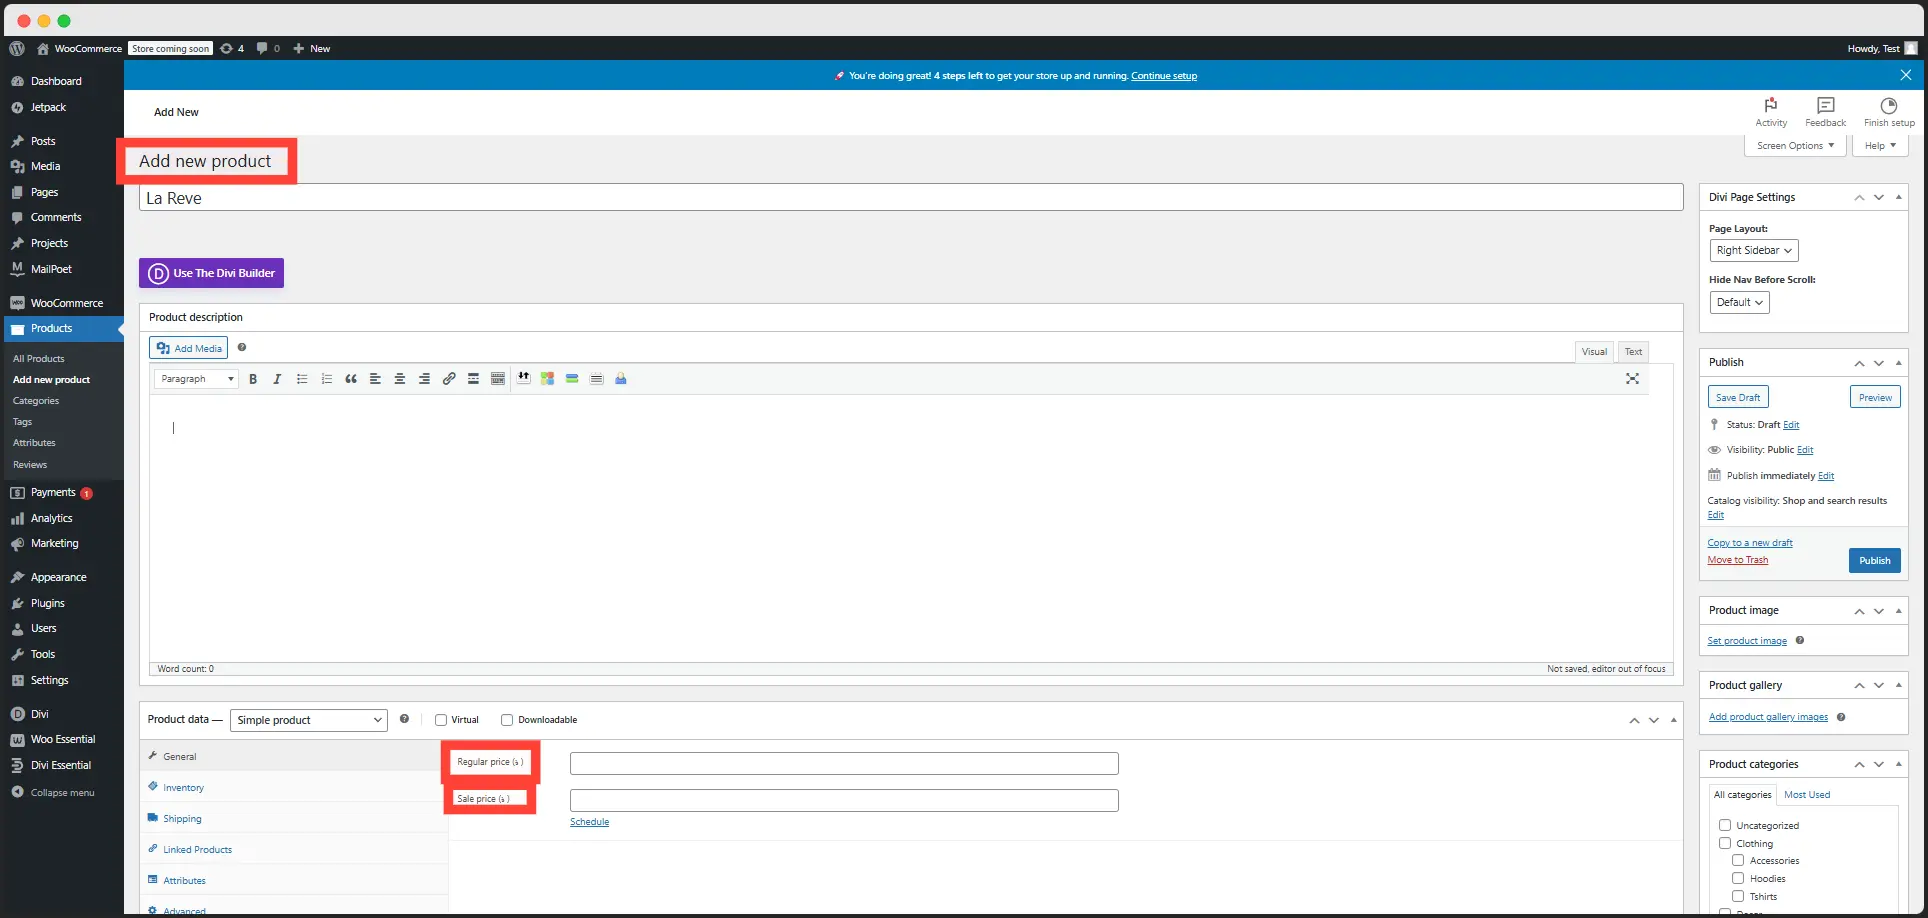
- From the Product option of Dashboard, click Add New Product
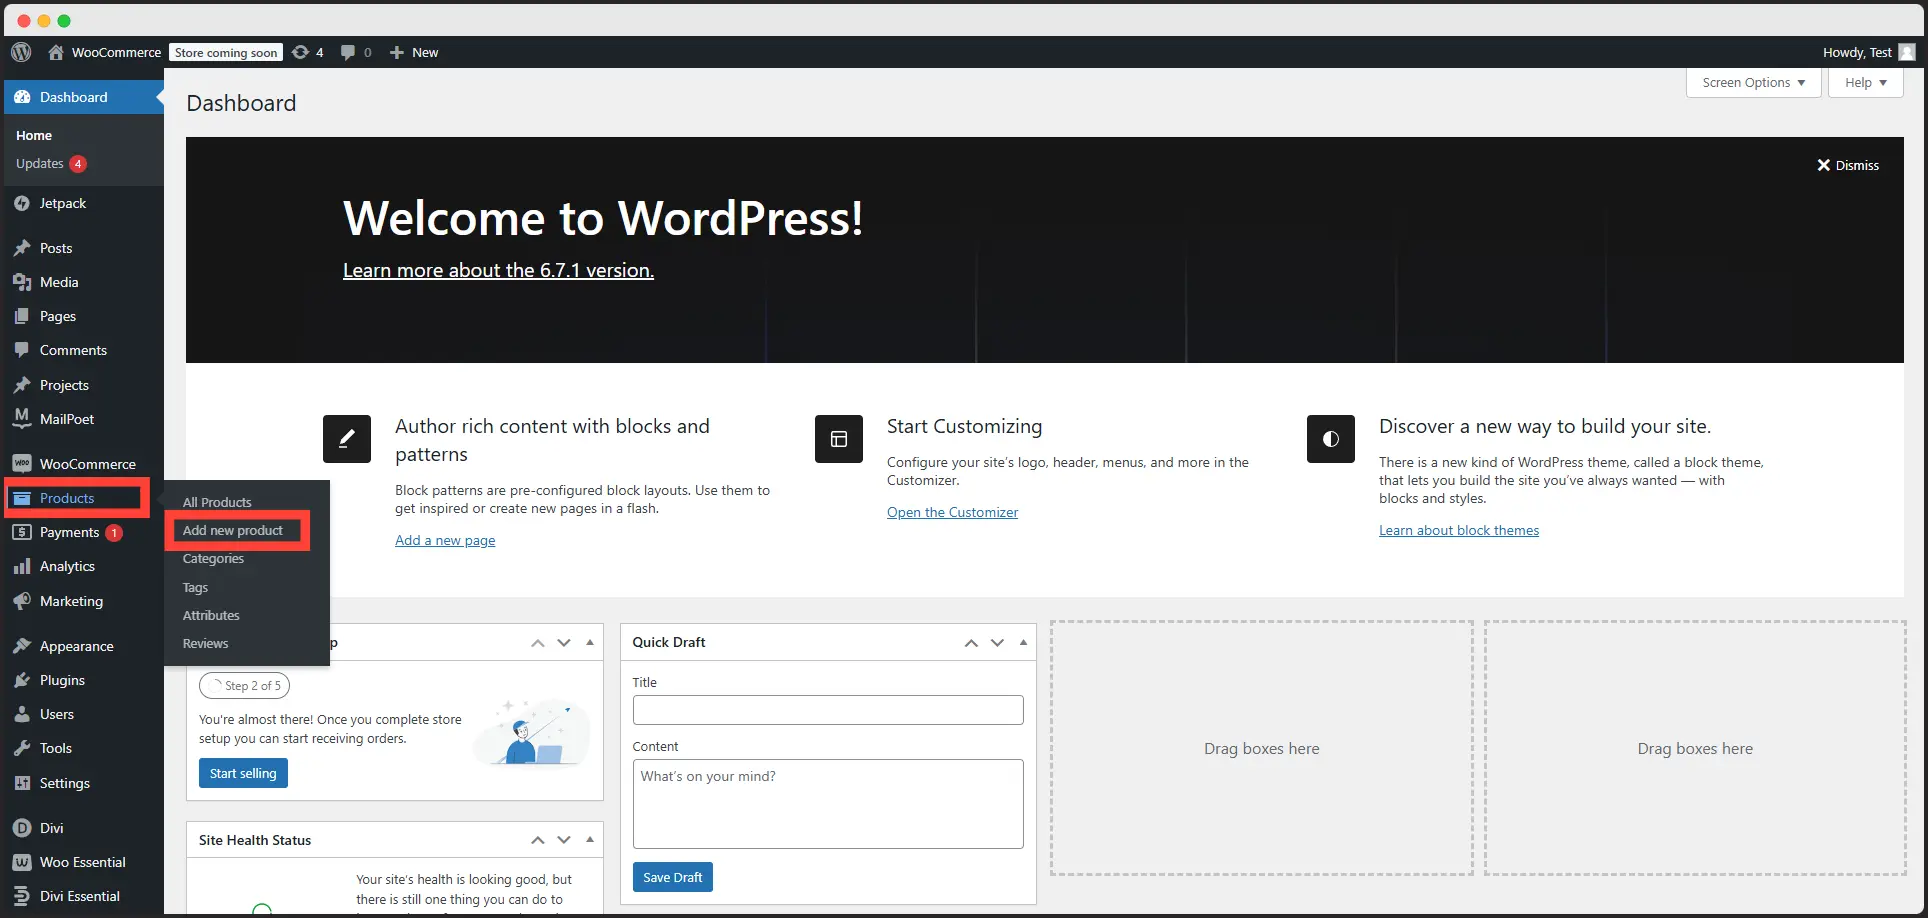
- Add New product by entering name, price, sales price and other information, if needed.
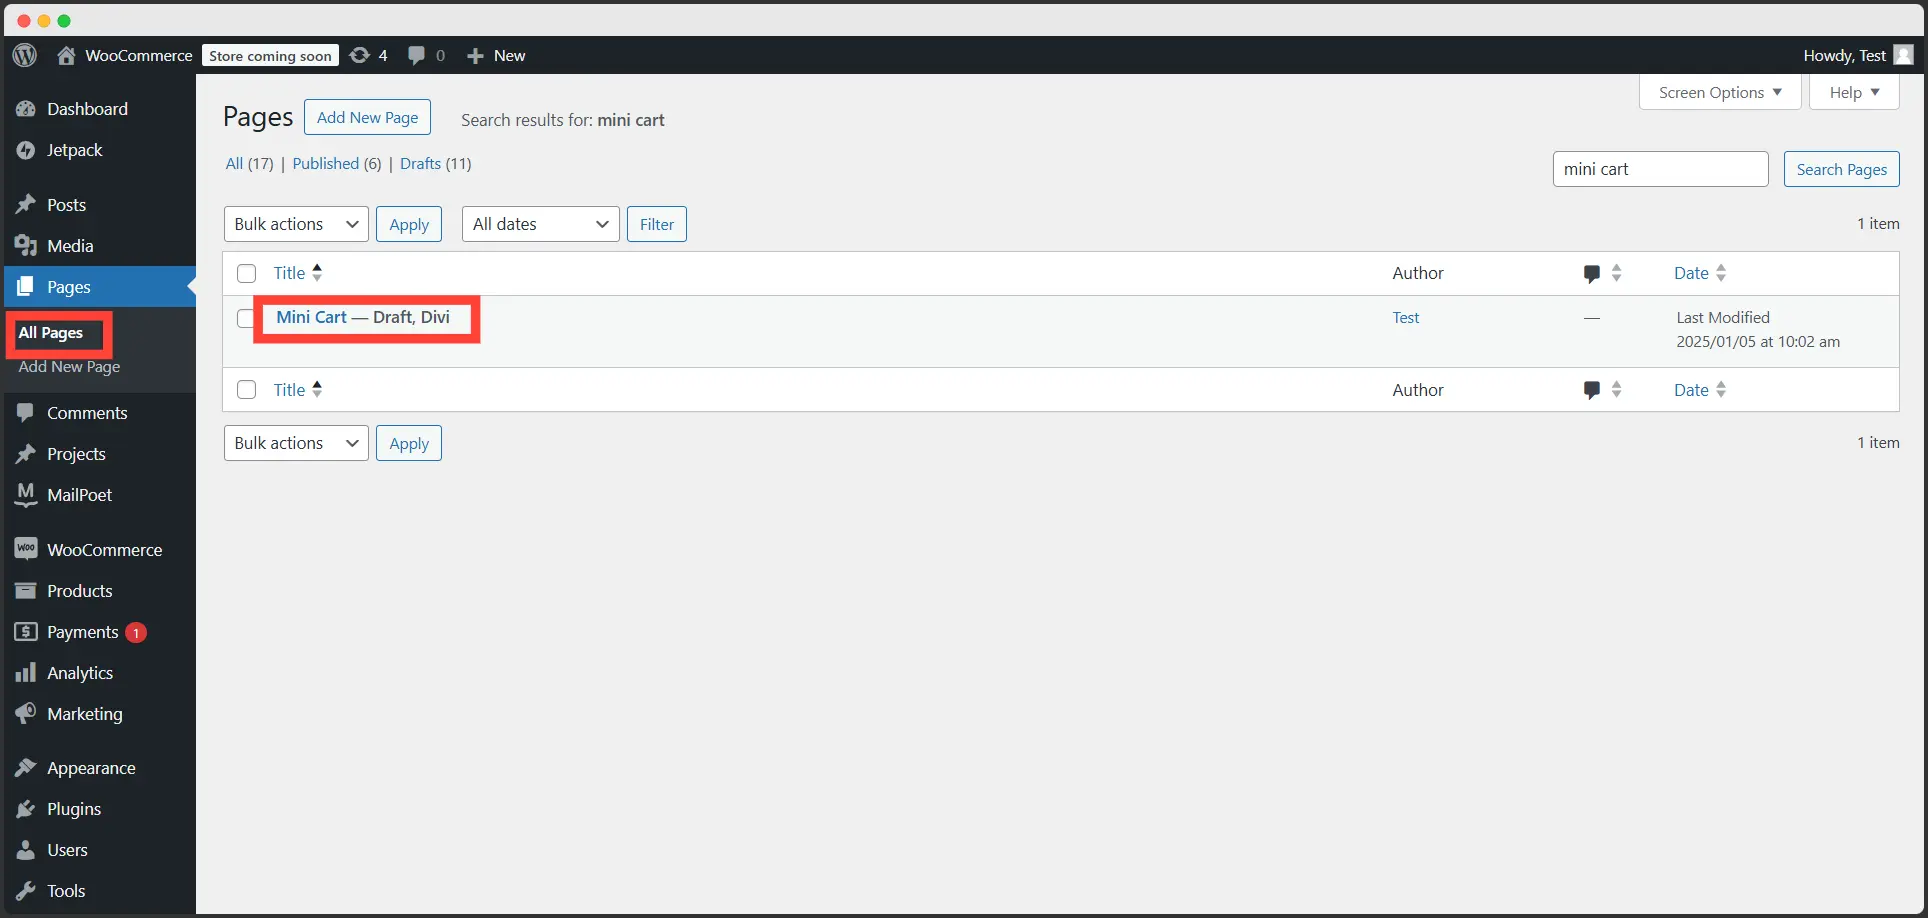
From the dashboard, hover on pages and select All Pages. You’ll find your previously created site there. Choose Edit with Divi from the options.
Add New Row. Select the best suited row pattern for your site.
Search Product Grid and select it.

Your saved products will automatically be added in the row.
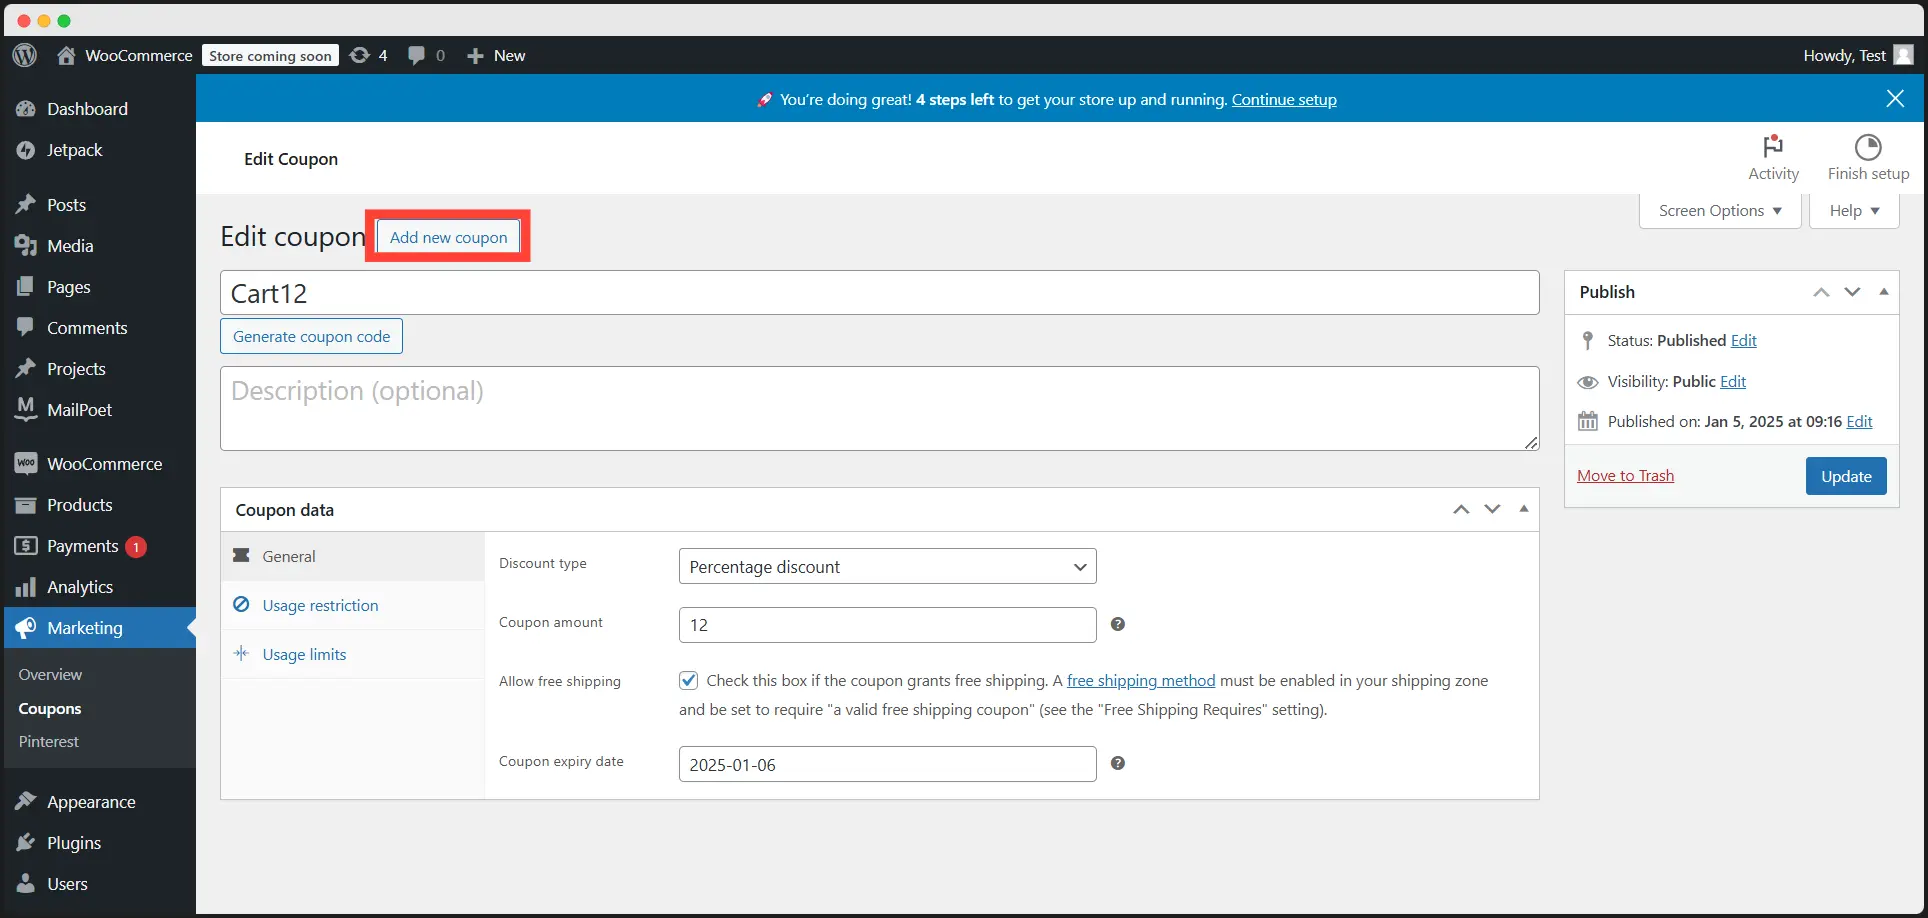
Step 6: Create Coupon Code
Finally, your page is ready to add coupons. Go to Dashboard and from WooCommerce, click coupons.
Add a New Coupon. Give the coupon a name. Add the discount amount or percentage you want to provide.
Now, go back to your page. Save, or publish it, and click Exit Visual Builder.
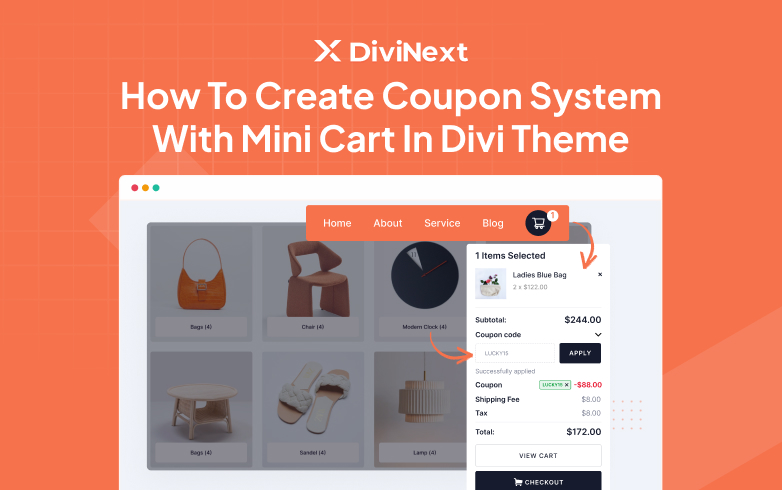
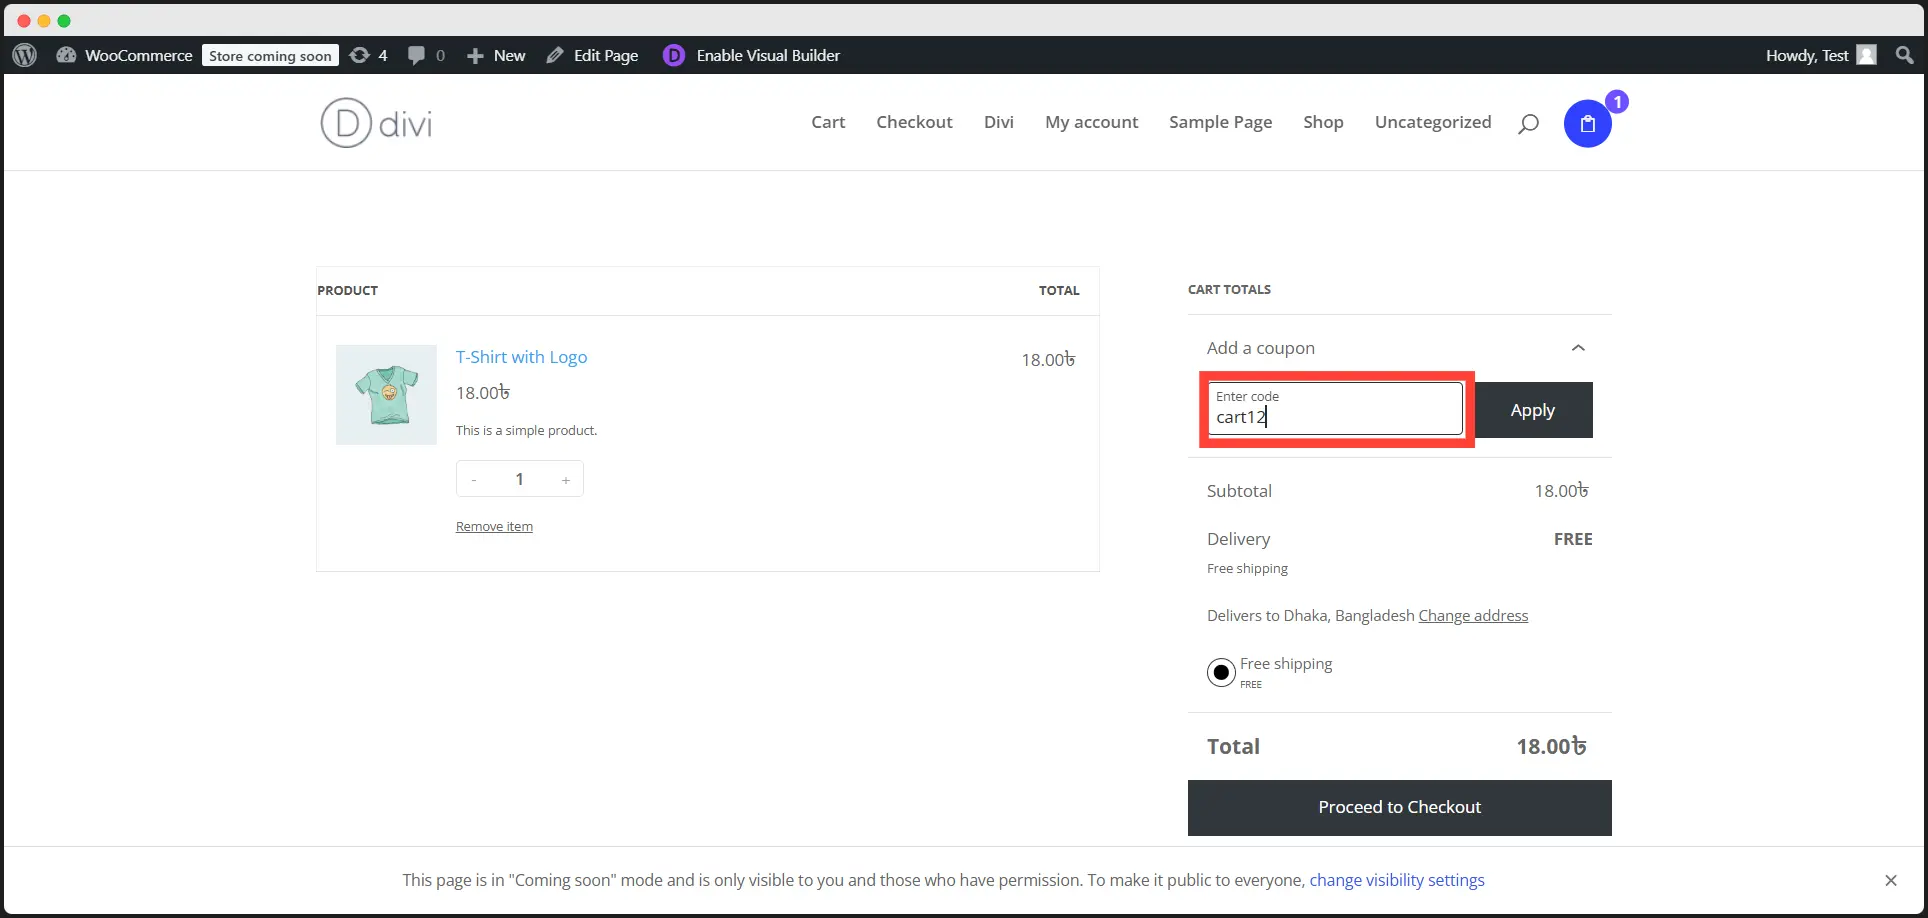
Now, add a product to the cart. Hover on the cart and click View Cart option.
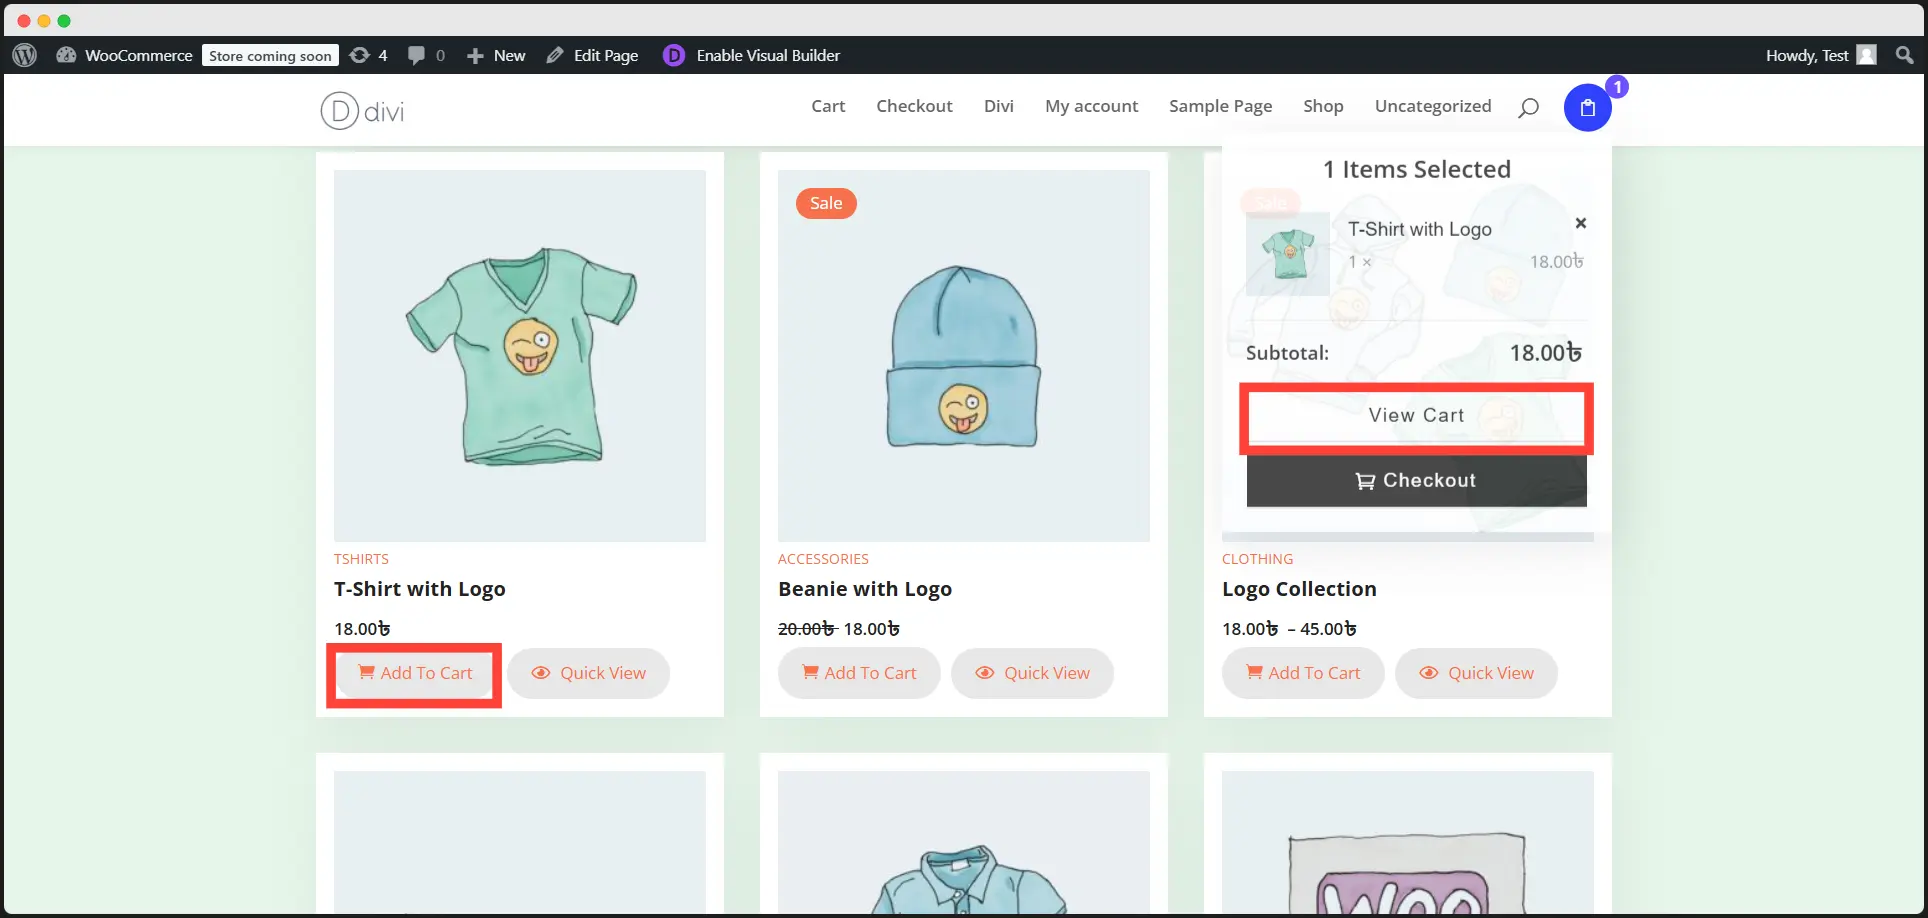
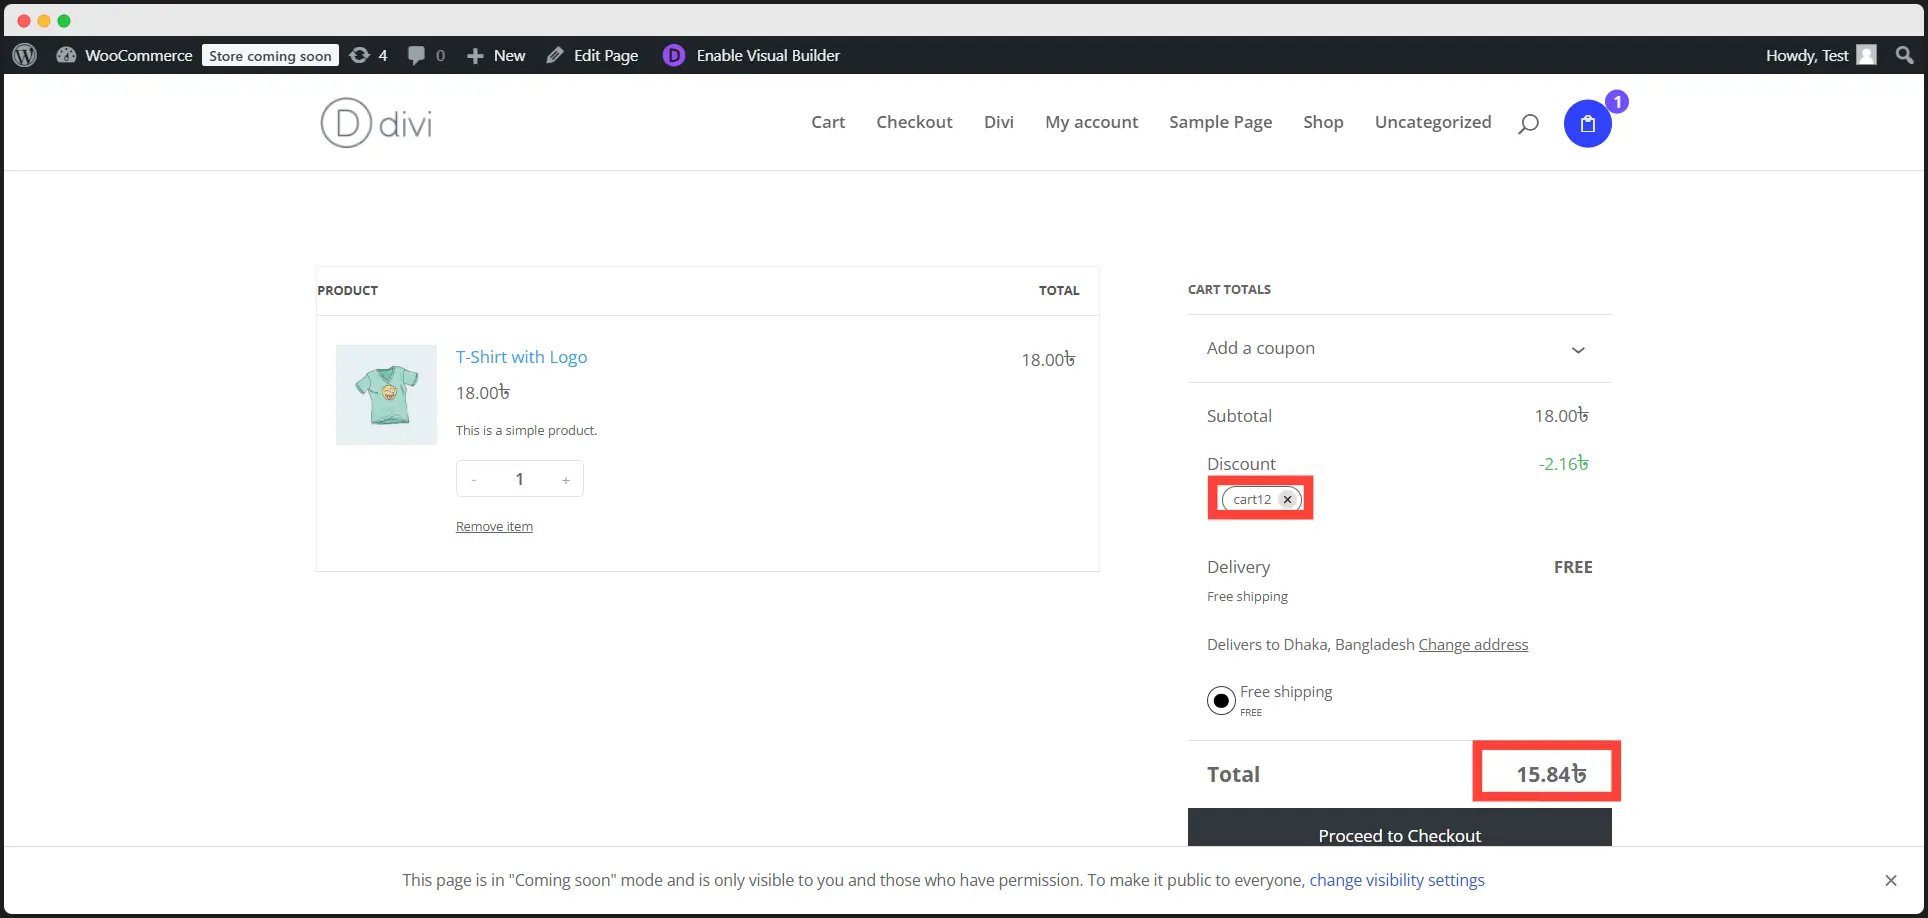
Enter your coupon code and apply.
Your coupon will be automatically added!
To Wrap It-up
And there you have it—your complete guide to creating a coupon-ready Mini Cart in Divi!
By setting up this feature, you’re not just offering discounts—you’re creating a seamless, enjoyable shopping journey that keeps customers coming back for more. Whether you're a pro or just getting started with Divi, this guide makes the process simple and effective.
Now it’s time to let your Mini Cart work its magic—boost conversions, delight customers, and make every shopping experience unforgettable. Got questions or need more tips? Drop a comment or share your experience—we’re here to help you level up your eCommerce game!
Frequently Asked Questions on Divi Mini Cart Creation
Do I need any additional plugins to set up the Mini Cart in Divi?
Yes! You’ll need WooCommerce as the backbone of your eCommerce functionality. Once WooCommerce is set up, you can enable and customize the Mini Cart through Divi’s Woo Essential module.
Is the Mini Cart compatible with WooCommerce product grids and templates?
Yes! You can use WooCommerce’s product grid functionality to showcase your items and integrate them with Divi Starter Templates for a cohesive, professional-looking online store.
Is the Mini Cart in Divi mobile-friendly?
Yes! The Mini Cart is fully responsive, ensuring a smooth shopping experience on any device.
Can I add custom coupon rules?
Definitely! WooCommerce allows you to set rules like minimum purchase amounts, product-specific discounts, or usage limits.
Can I test the Mini Cart and coupon functionality before going live?
Of course! Use WooCommerce’s test mode or create dummy products to ensure everything works perfectly.

0 Comments