How to Use the Divi Before After Module: A Complete Step-by-Step Tutorial

Product comparisons got you scratching your head? Let’s not make your visitors do the same! Instead, wow them with an interactive slider that lets them seamlessly compare two stunning images side by side. Magical, right? That’s exactly what the Divi Before After module brings to your website!
Whether you’re showcasing a makeover, a home renovation, or your photo editing skills, this module is here to make your site both visually appealing and irresistibly engaging. Let’s dive into how you can use it to wow your visitors.
How Divi Before After Can Make Your Website More Interactive & Better
In today’s digital world, grabbing attention is all about interactivity. The Divi Before After module is a game-changer for showcasing transformations, comparisons, and progressions. Here’s why it’s a must-have:
- Engagement: Visitors love to interact, and this slider keeps them hooked.
- Storytelling: Perfect for before-and-after comparisons, it tells a visual story in seconds.
- Professionalism: It’s sleek & modern, and makes your website look top-notch.
Whether you’re a photographer, interior designer, or marketer, this module adds that wow factor that keeps visitors coming back.
Step-by-Step Guide for Using Divi Before After
Discover how easy it is to create stunning before-and-after comparisons with Divi! This Step-by-Step Guide will walk you through the process of adding interactive sliders to your website in no time.
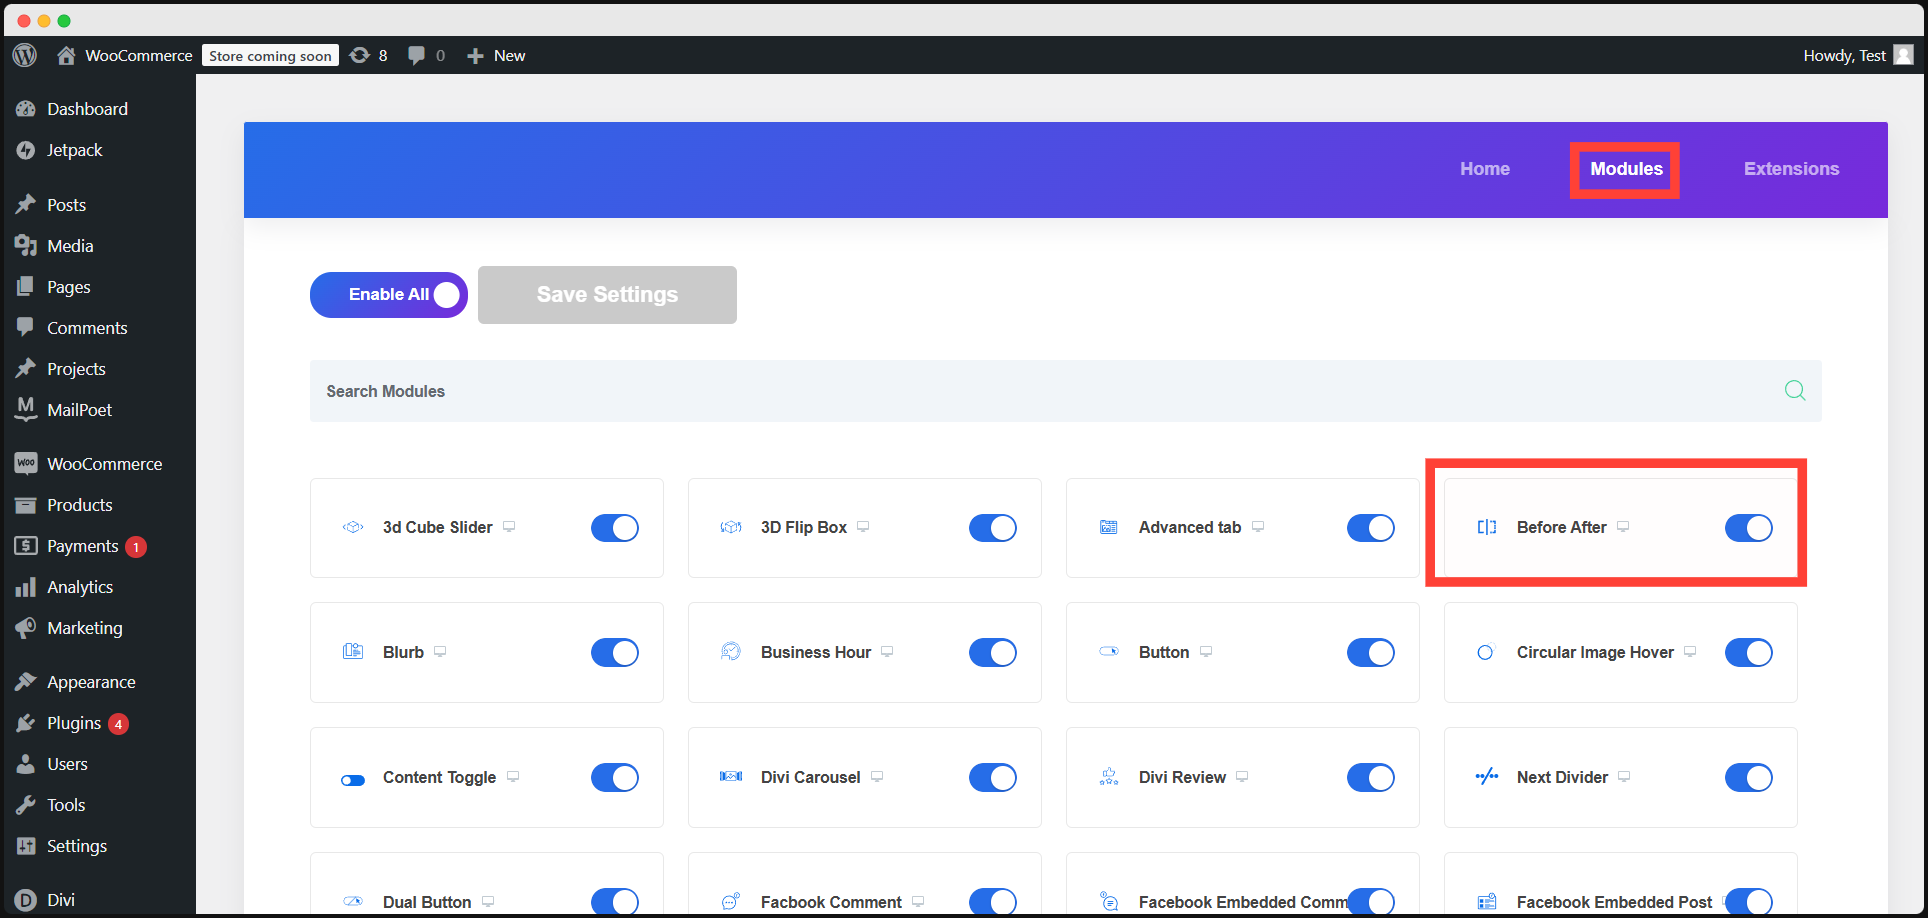
Step 1: Enable the Before After Module in Divi Essential
Log in to your Divi dashboard. Make sure you’ve installed Divi Essential. Navigate to Divi Essential Modules and enable the “Before After” module.
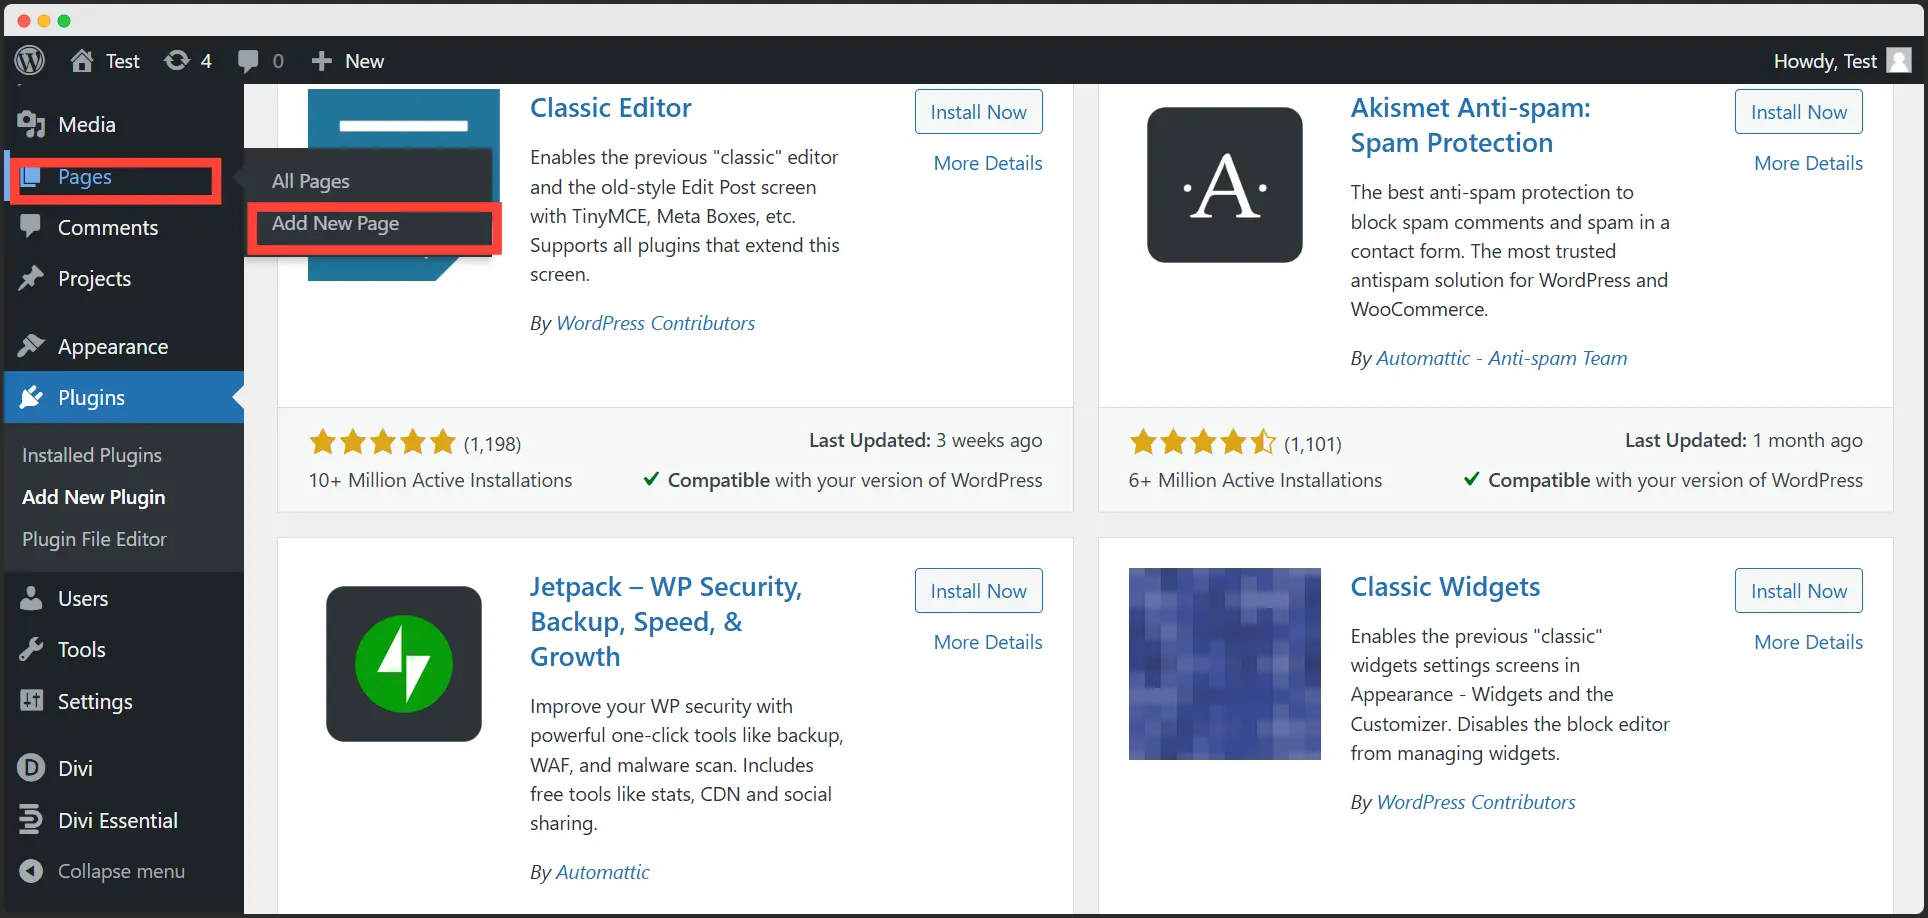
Step 2: Start a New Post
Create a new post and select the option to build it from scratch.
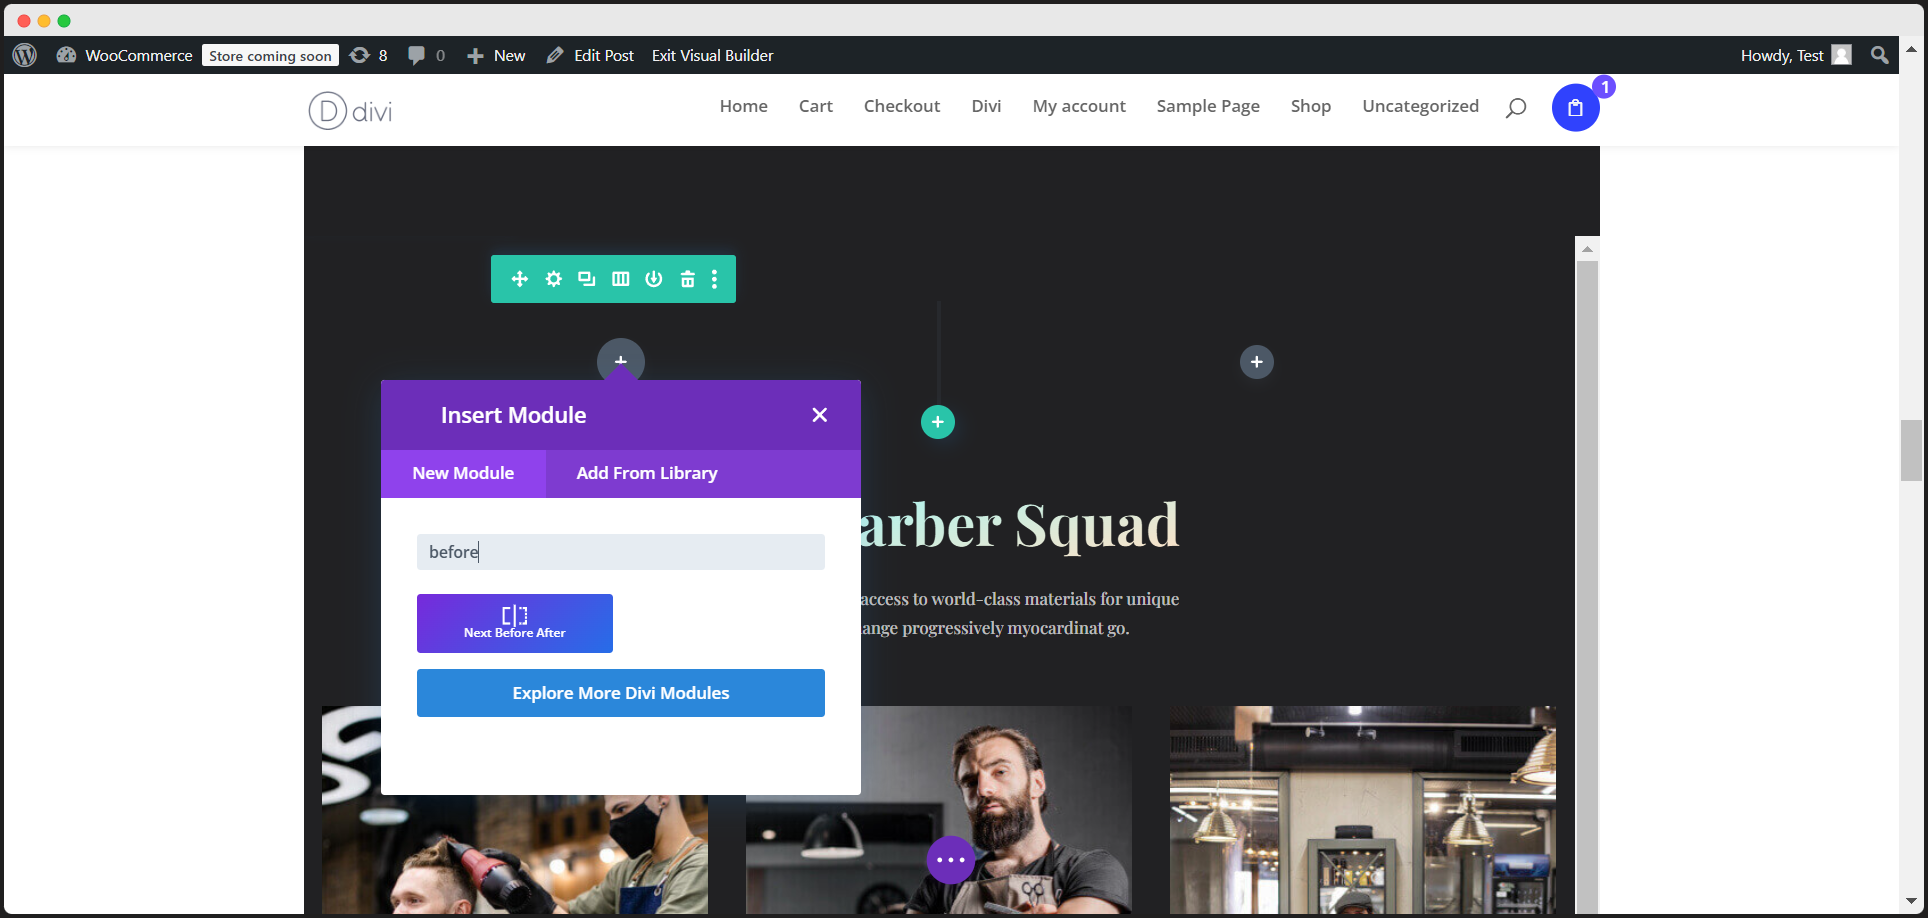
Step 3: Add the Before After Module
In the Divi Builder, look for the “Before After” module and add it to your layout.
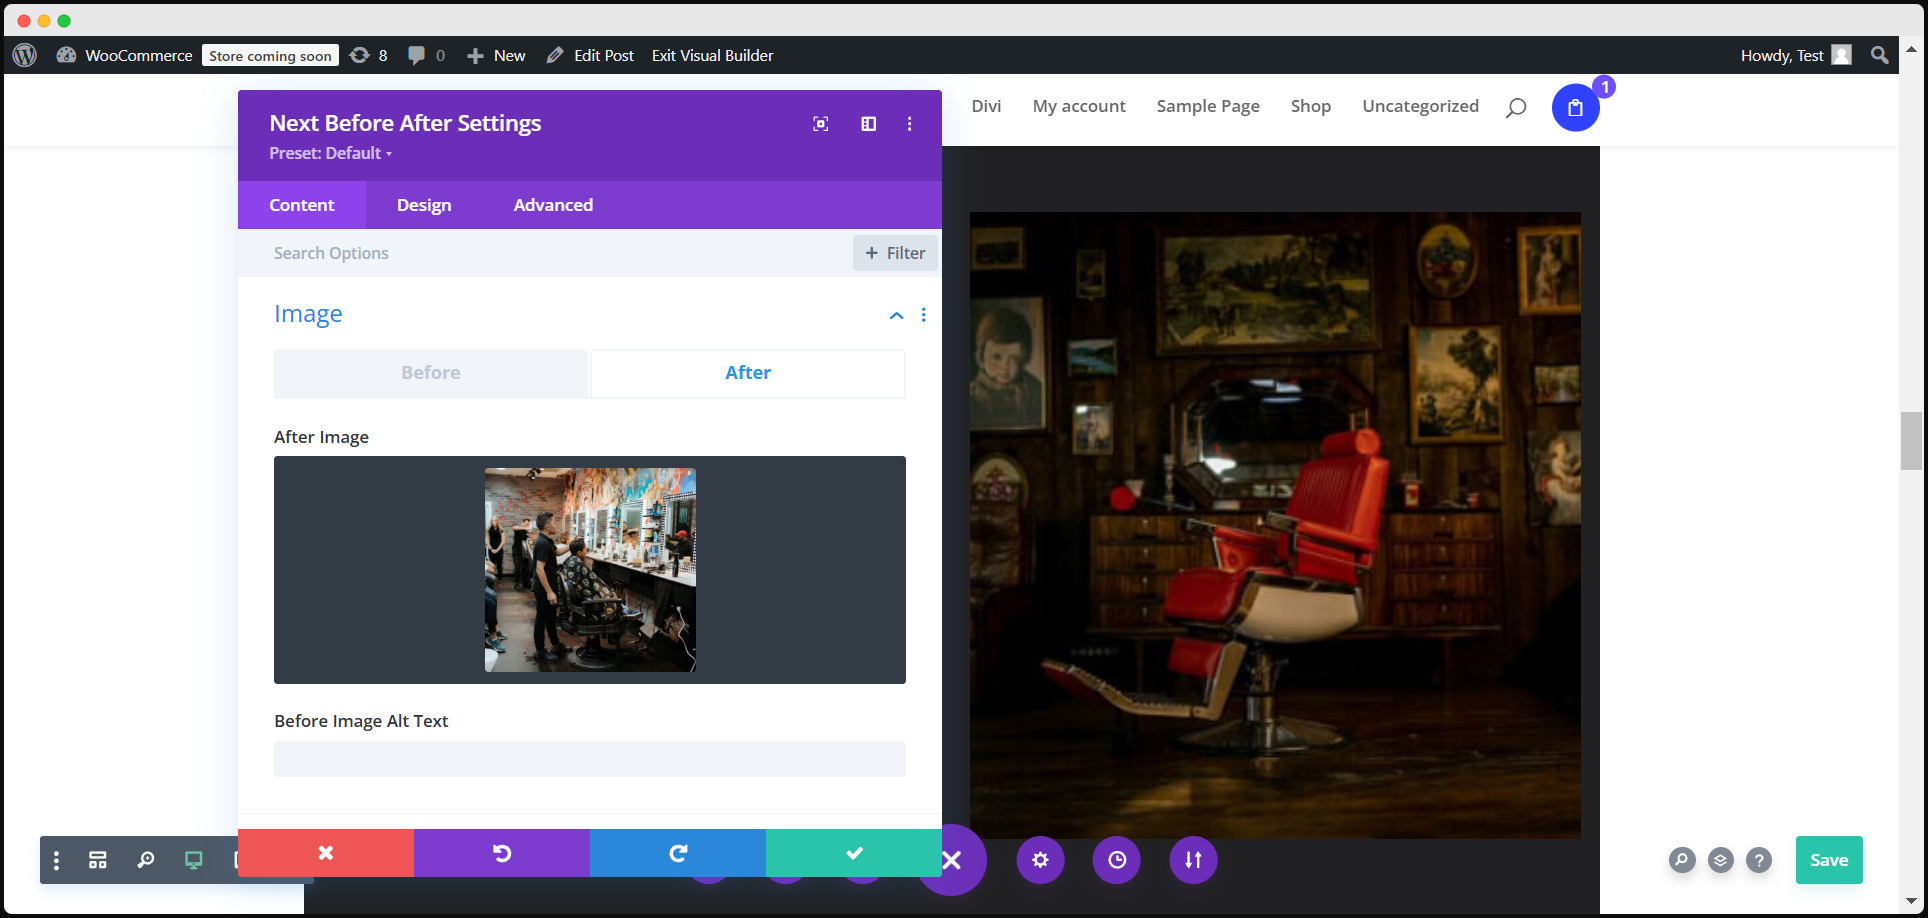
Step 4: Configure Content Settings
- Add Images: Upload your “Before Image” and provide Alt Text for accessibility. Upload your “After Image” and include Alt Text here too.
- Add Labels: Customize the text for the “Before” and “After” labels to make them more descriptive or fun.
Step 5: Adjust Design Settings
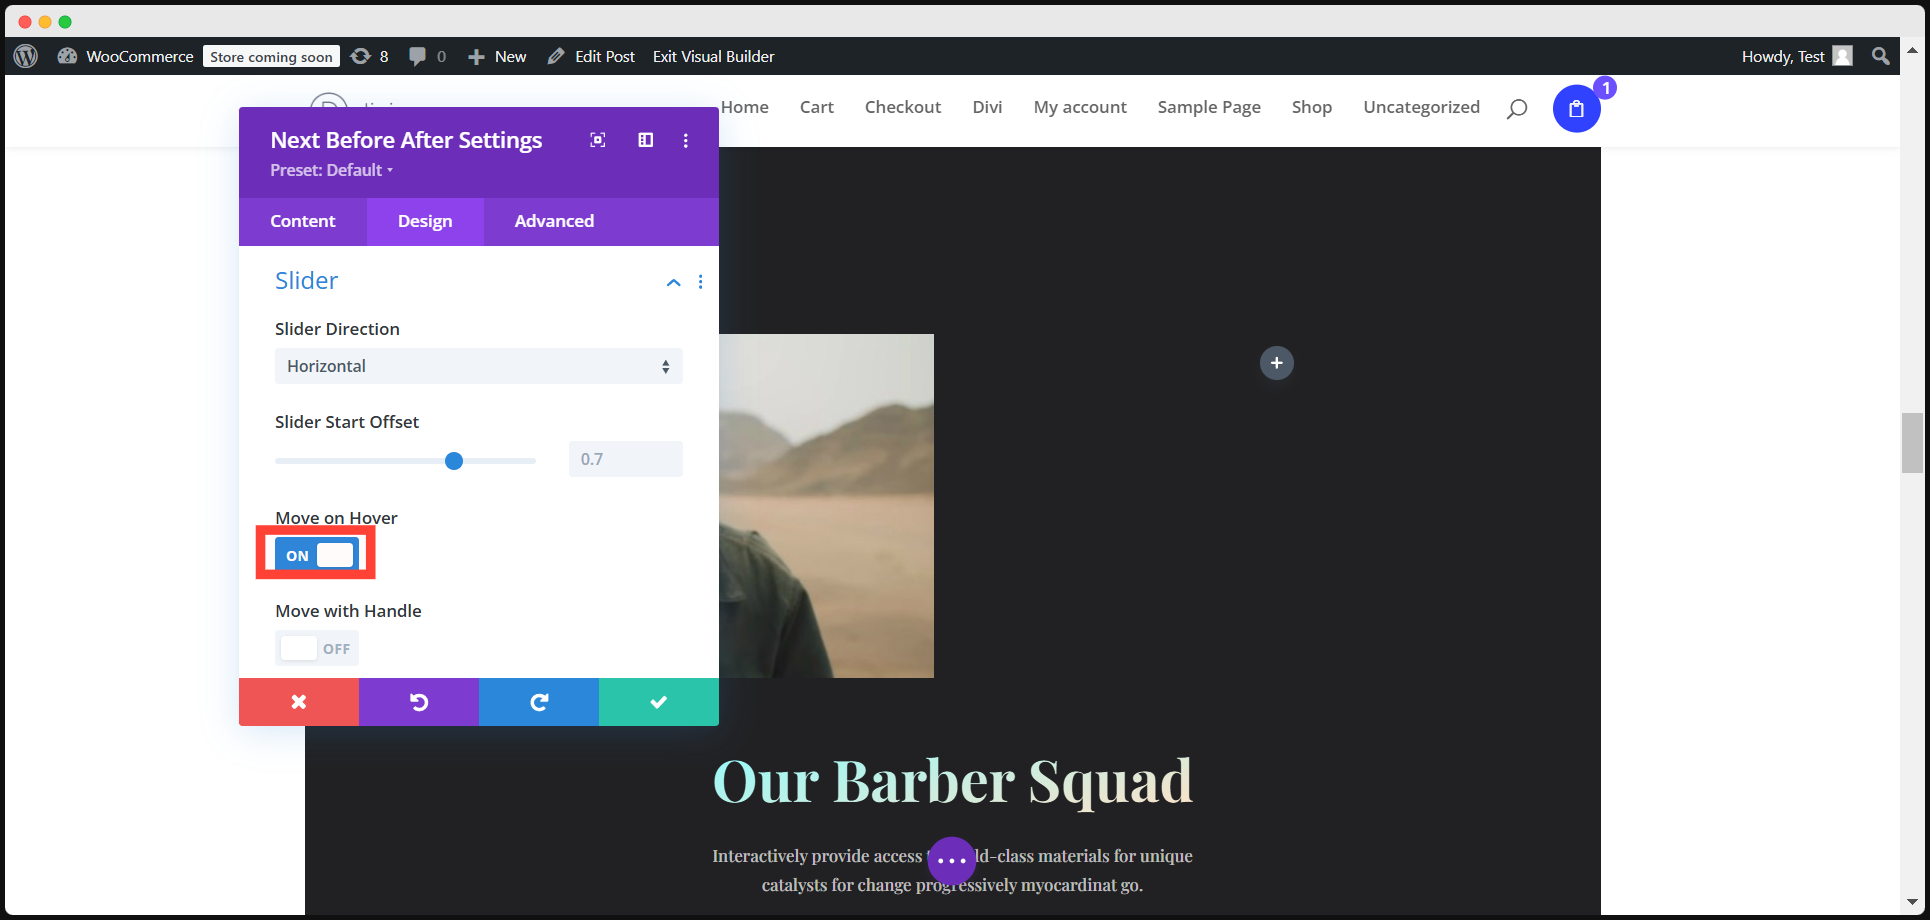
- Slider Settings: Choose the Slider Direction (horizontal or vertical). Adjust the Slider Start Offset to position the handle where you want (e.g., left, center, or right). Enable options like Move on Hover, Move on Handle, or Click to Move for added interactivity.
- Customize Colors: Personalize the slider, handle, and icon colors to match your website’s theme.
Step 6: Customize Labels
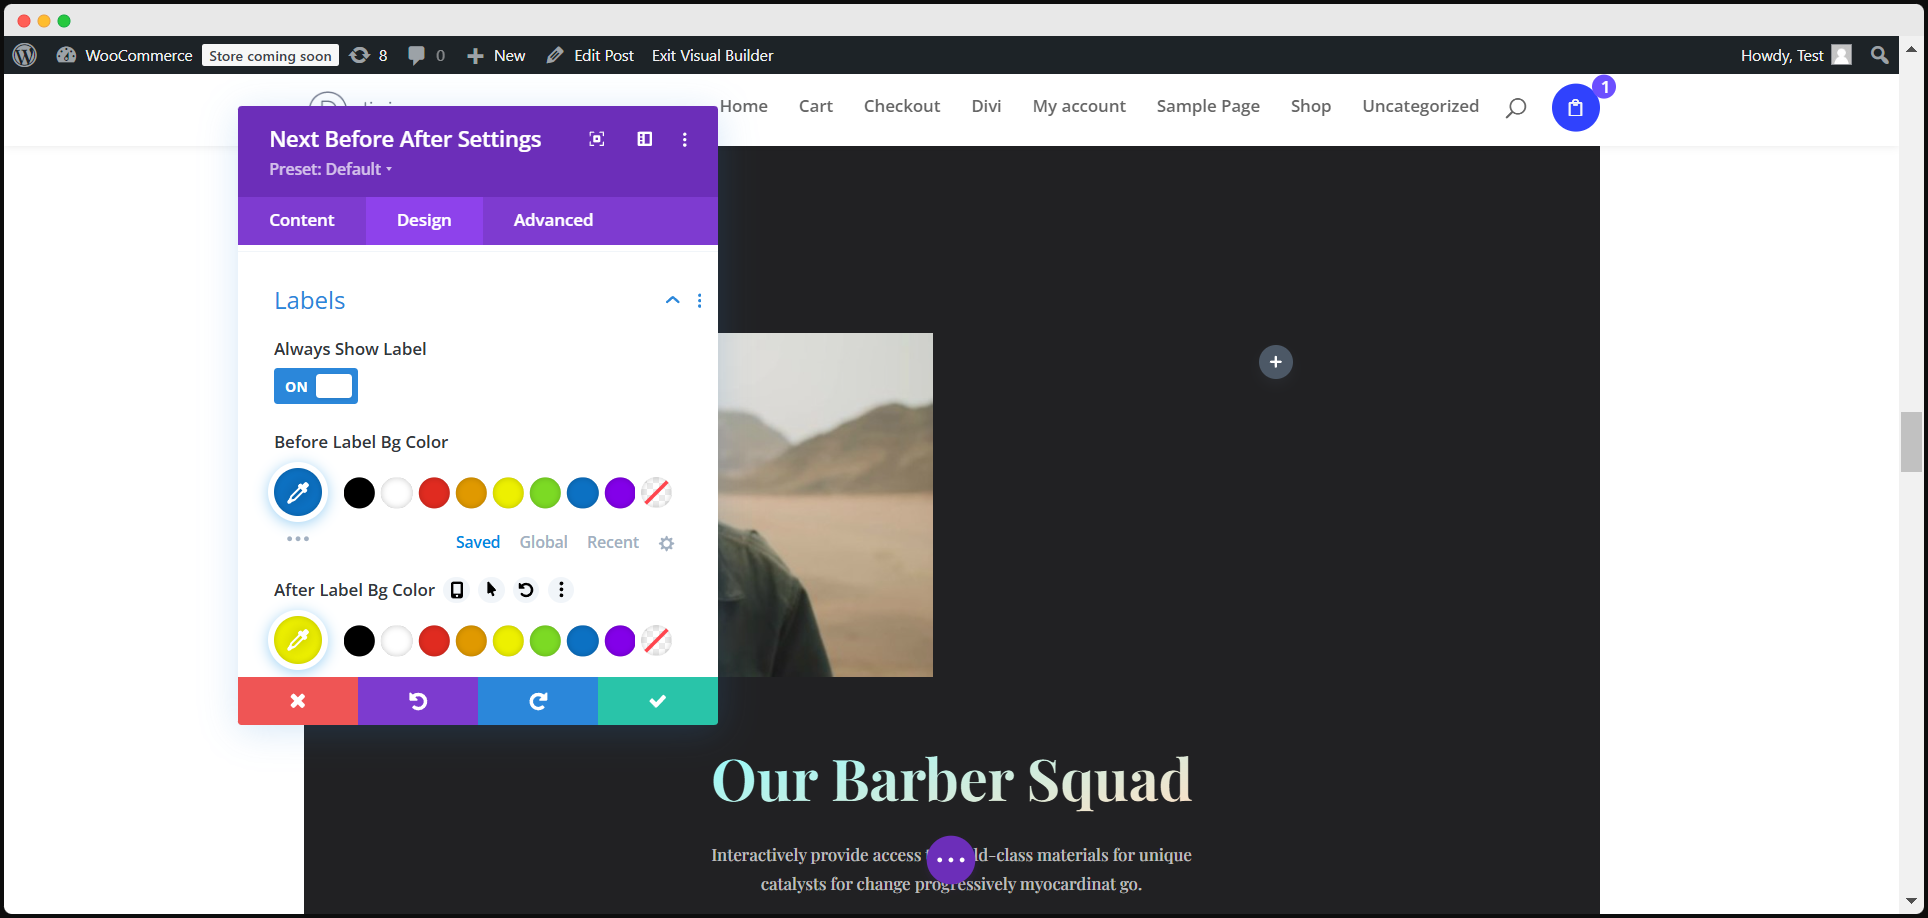
Enable labels to display them permanently. Add background colors to the labels for better visibility.
Step 7: Add Overlay Effects
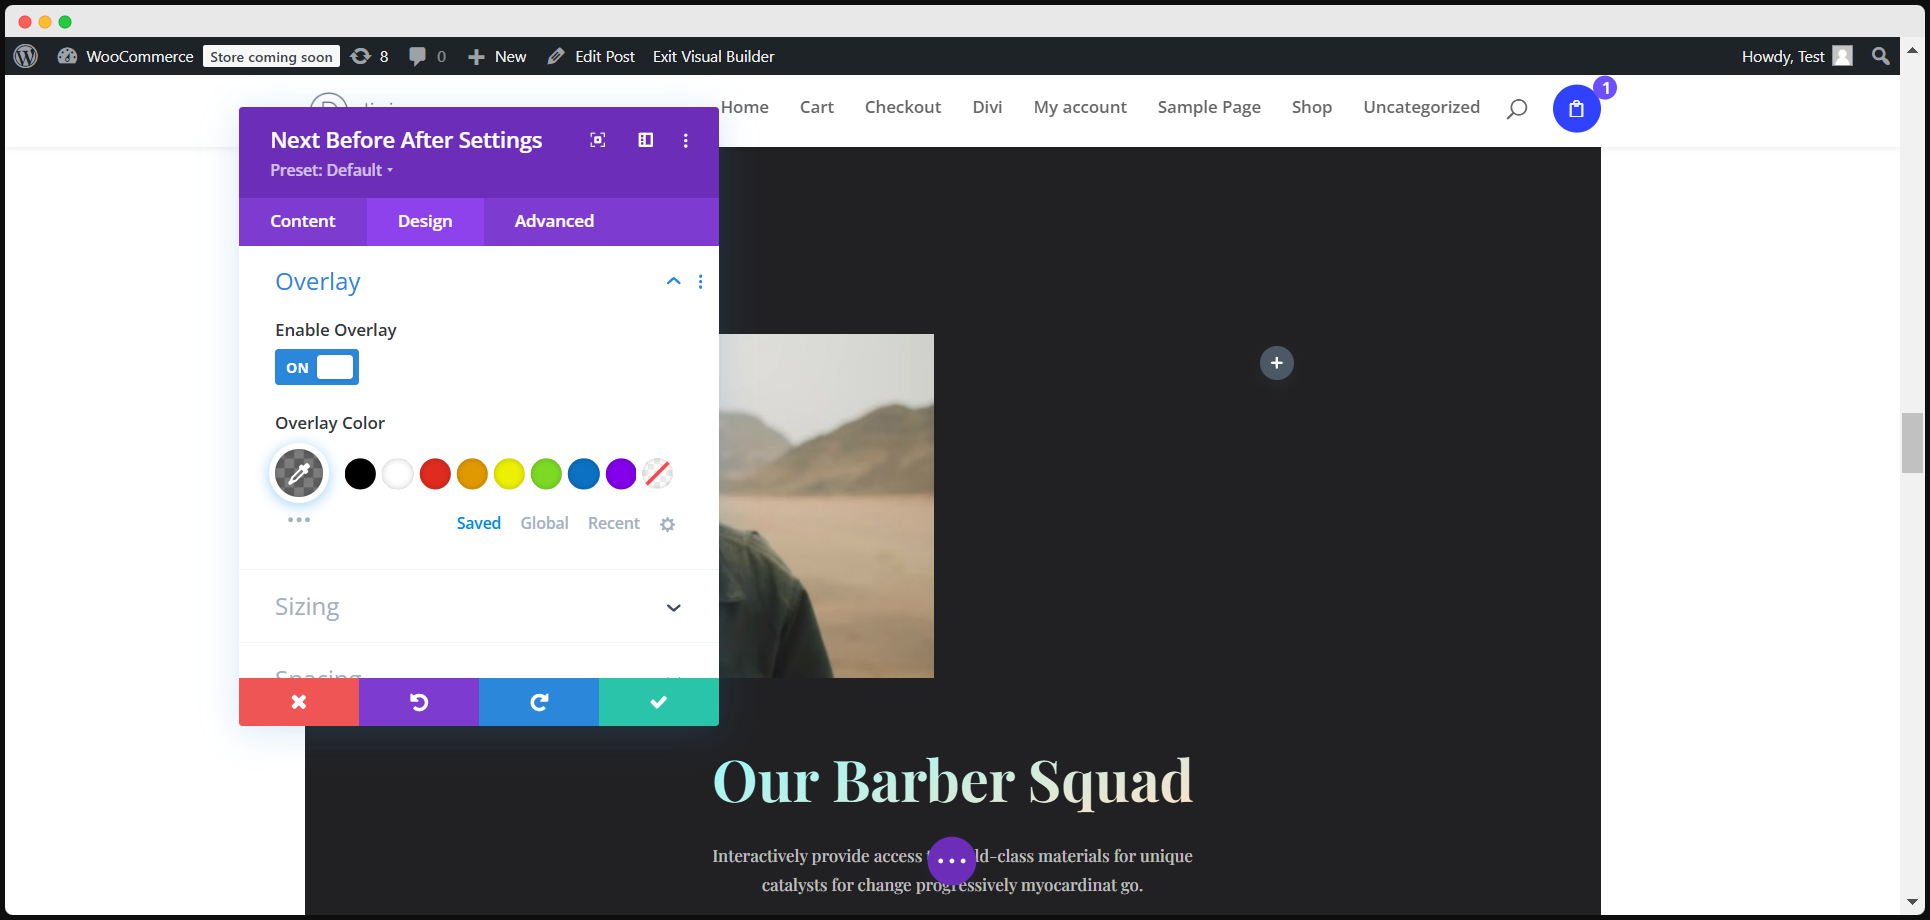
Enable the overlay option for an eye-catching hover effect. Choose overlay colors to enhance the overall design.
Wait for the Final Result…
Wrap-up
And there you have it! The Divi Before After module is a powerful tool to turn static comparisons into dynamic, interactive experiences. By following this step-by-step guide, you’ll be creating mesmerizing before-and-after sliders in no time.
So, go ahead and give your website the upgrade it deserves—your audience will thank you for it!
Frequently Asked Questions on Divi Before After Module
Can I use the Before After module for any type of images?
Yes! Whether it’s for makeup transformations, product comparisons, or landscape changes, this module works perfectly.
Is Divi Before After Module beginner-friendly?
Absolutely! With Divi’s intuitive builder and this guide, you’ll have no trouble setting it up.
Can I customize the slider direction?
Of course! You can choose between horizontal and vertical sliders to fit your content style.
Is the module responsive on mobile?
Absolutely! The Divi Before After module is fully responsive and looks great on any device, ensuring that your content is always accessible and visually appealing.
Can I add hover effects to the images?
Yes! You can enhance user experience with an overlay effect and other interactive hover options for a more engaging visual experience.

